
Move or Clone TFS from one hardware to another in TFS 2017/2018
App Dev Manager Guru Satish Piduru and DSE Aaron Perry explore new options to move or clone TFS from one hardware installation to another using TFS 2017/2018.
Prior to Team Foundation Server (TFS) 2017, moving or cloning of a TFS instance required manual preparation and configuration of existing instance’s backups. As of the time of this blog, the documentation for Move or Clone Team Foundation Server from one hardware to another only describes this older process. Many administrators familiar with this older process will recognize the TFSConfig commands PrepareClone, ChangeServerID and RemapDBs. Starting with TFS 2017, PrepareClone is no longer available. ChangeServerID and RemapDBs are still available but no longer needed. You can now configure your restored databases completely through the application tier.
This blog walks through the new process to demonstrate how to restore and configure an instance of TFS to new hardware. The steps in this blog show the simplest form of backup and restore using the TFS administration console’s backup and restore utility. If you cannot use this methodology for backup and restore, you can manually complete the process using the tools SQL Server provides, however, there are additional steps that will need to be taken.
Note: If you plan to manually backup and restore the TFS databases, please follow the instructions at Backup and restore TFS. Once you have restored the databases to the new hardware, follow the steps in Configuring the new TFS instance section of this blog
Backing up your current TFS instance using the application tier
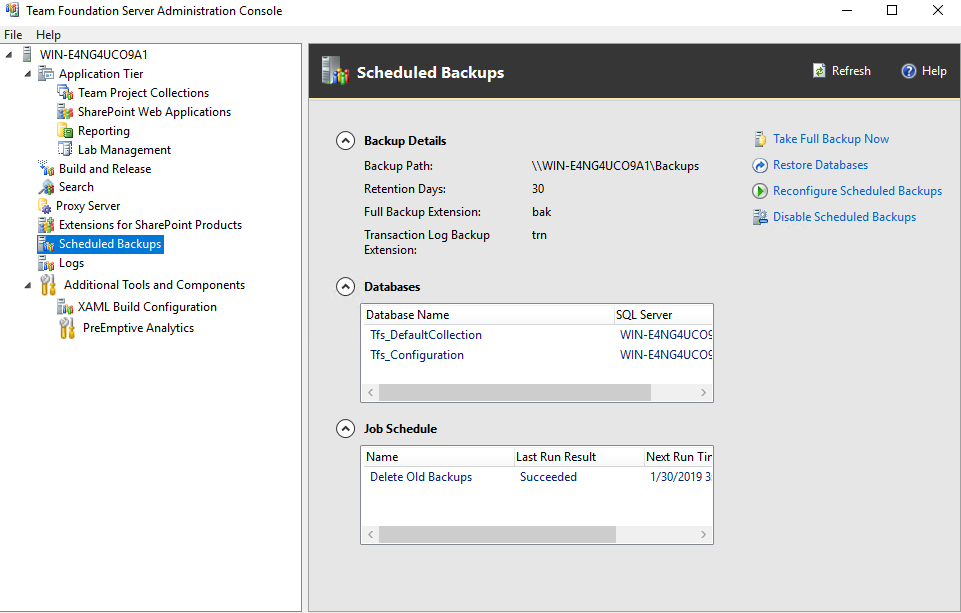
Log onto to the server where your current TFS instance is located and open the TFS administration console. In the console, navigate to the Scheduled Backups menu to create a backup as shown in the screenshot below. If you have not already created a scheduled backup to a network share with the manual option, do so now. Click Take Full Backup Now.
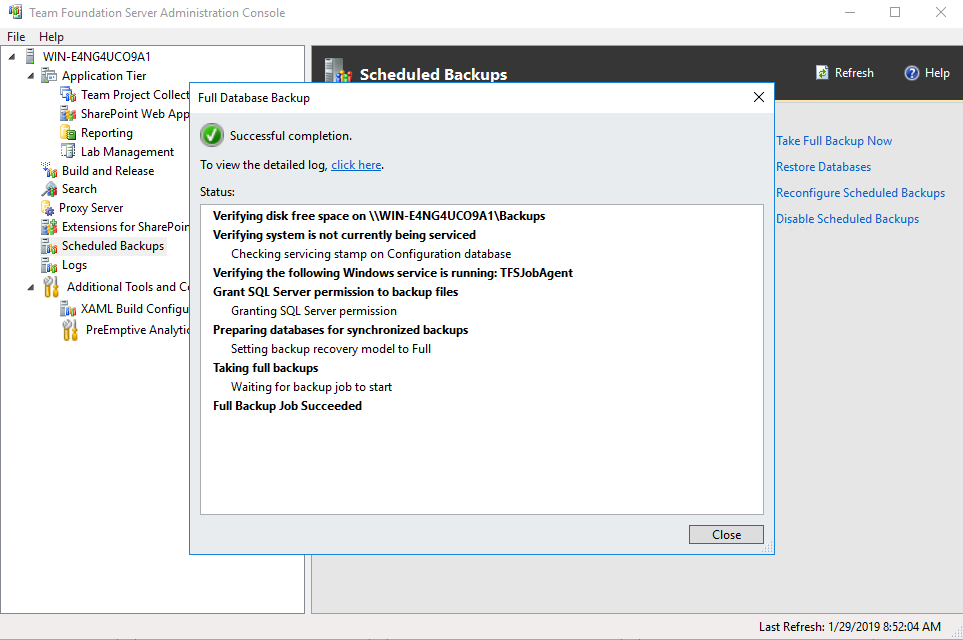
Verify the backup is created in the selected share, as shown in the screenshot below.
Preparing new hardware for restoration
You will need to configure your new hardware to match the server that hosts the current TFS instance. Your TFS and SQL Server versions should match your current instance versions. Please refer to Prepare the new hardware for details. Make sure to install but not yet configure Team Foundation Server.
Restoring TFS to the new hardware
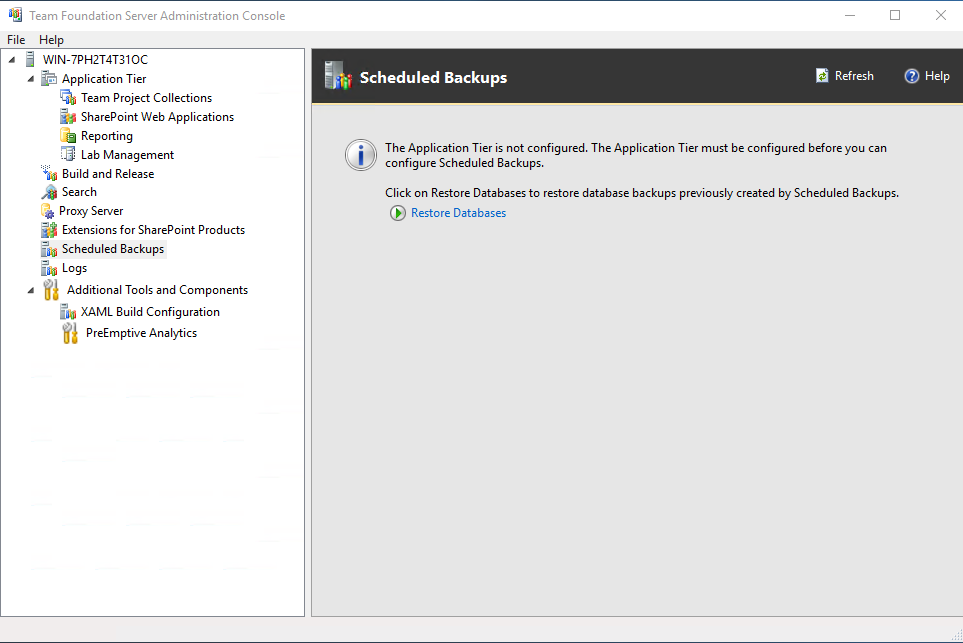
Log onto the server that will host the new TFS instance. Open the TFS administration console. At this time, TFS should be installed but not configured.
Navigate to the scheduled backups screen and click Restore Databases as shown in the screenshot.
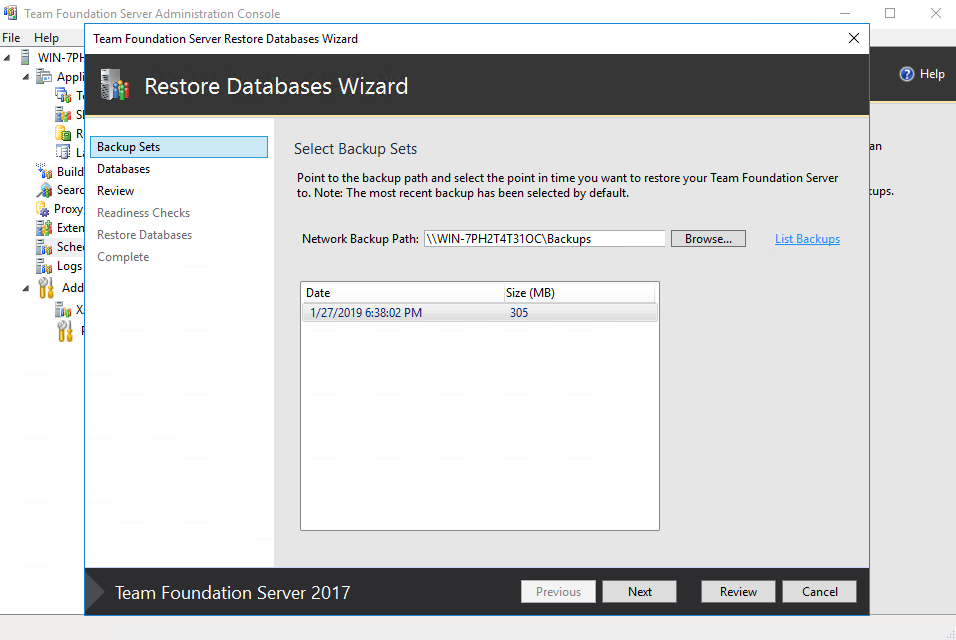
Enter the network path to the share that contains the backups created and click List Backups. Select the correct backup set and click next.
Select the SQL Server instance that will support the new TFS installation.

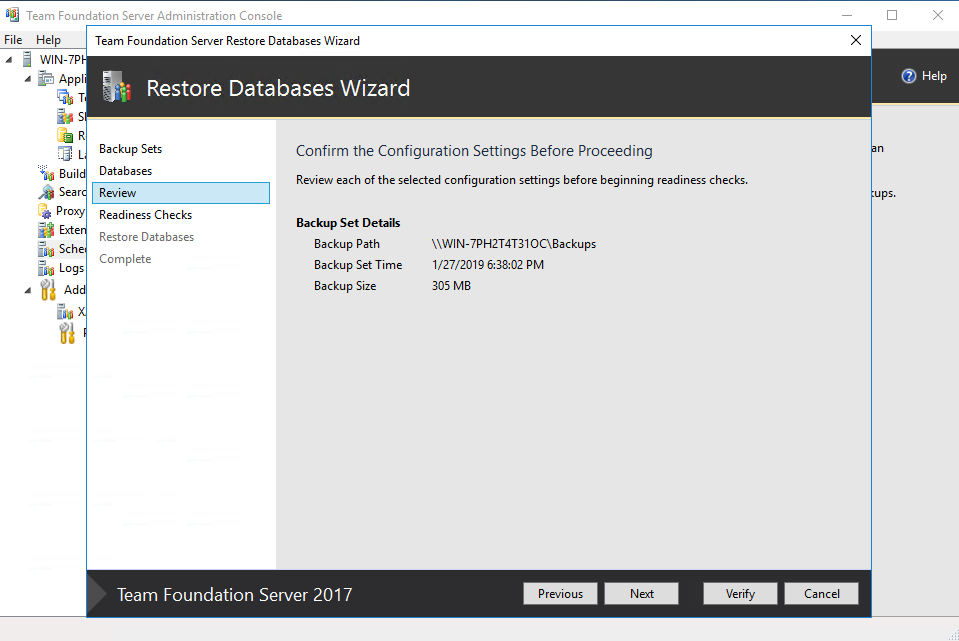
Confirm the configuration settings and continue to readiness checks.
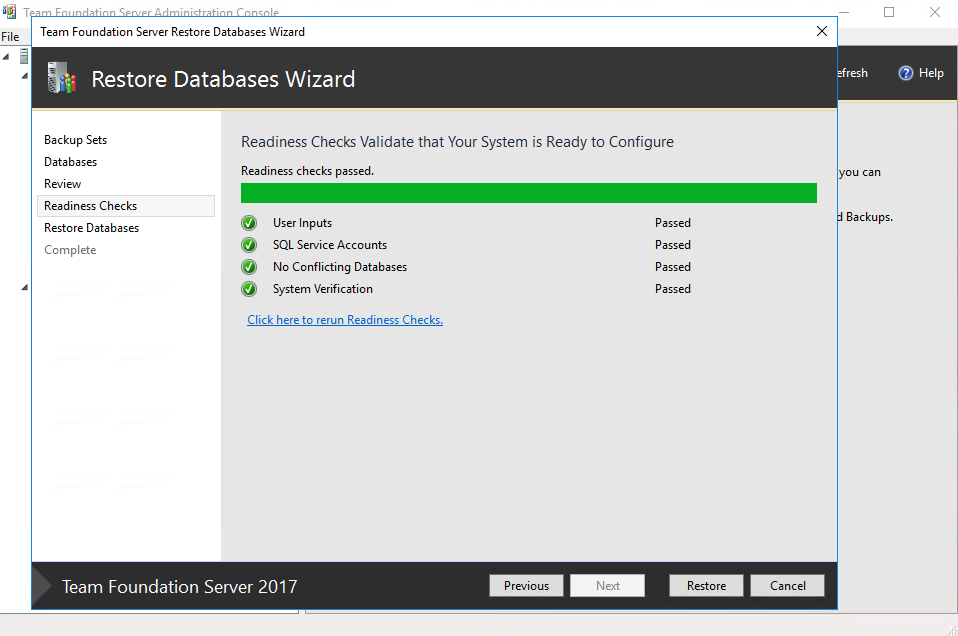
Once all the readiness checks are complete proceed to restore.
You should now see a restoration complete screen. You may see some warning messages about backup paths being changed and version control file cache needing to be cleared. Once the application tier configuration is complete, make sure to reconfigure the scheduled backups and clear the local and client cache. You can find more information about clearing the cache at the link provided in the wizard as well as in the Reconnect services and users documentation.
Configuring the new TFS instance
Now that you have successfully restored the prior instance database to the new SQL Server instance, you need to properly configure the new TFS instance. If not already done, open the TFS administration console on the server where the new TFS instance is installed.
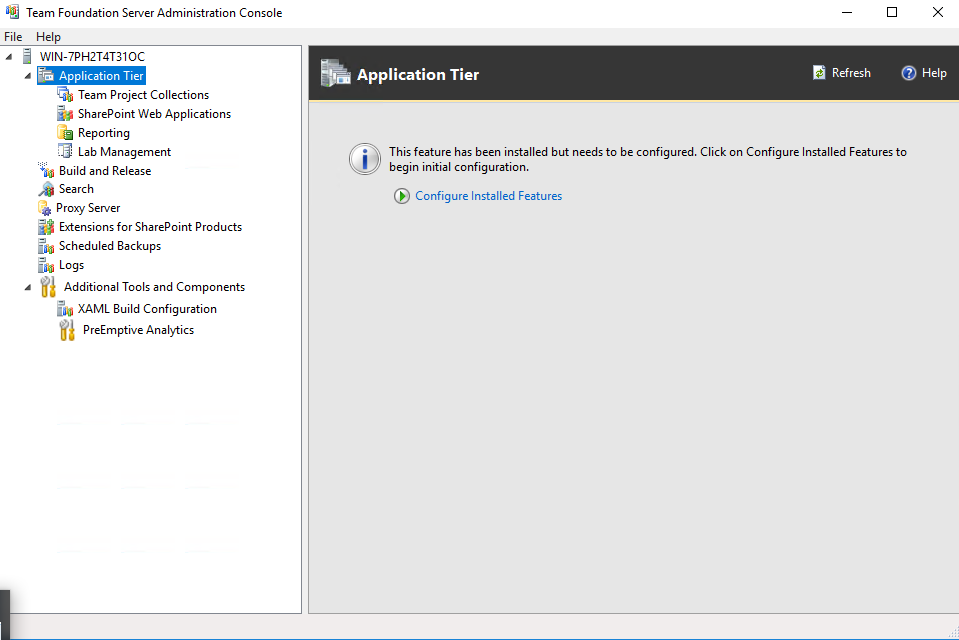
Select the Application Tier menu and click Configure Installed Features.
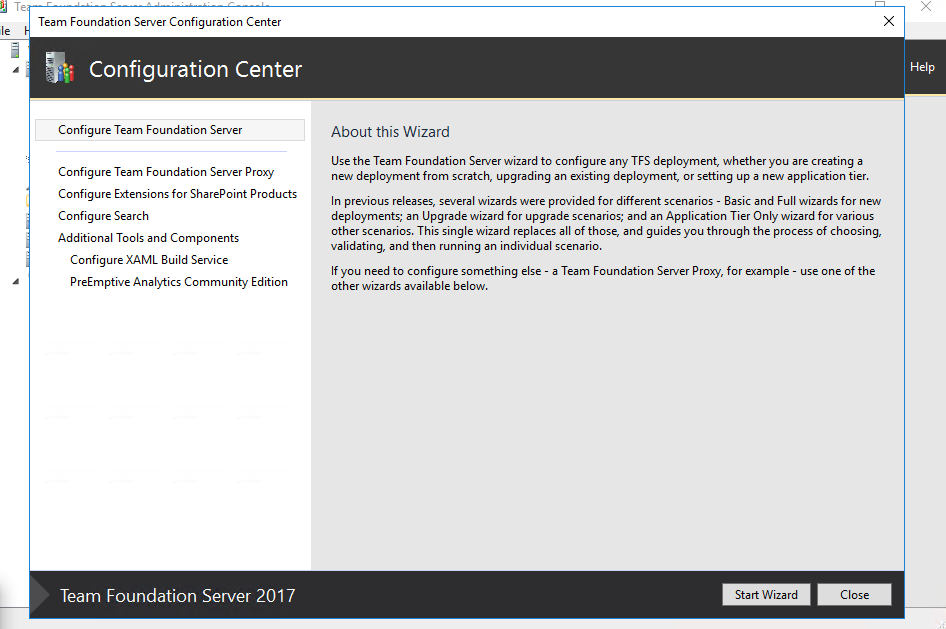
This will open the Configuration Center. Select Configure Team Foundation and click Start Wizard.
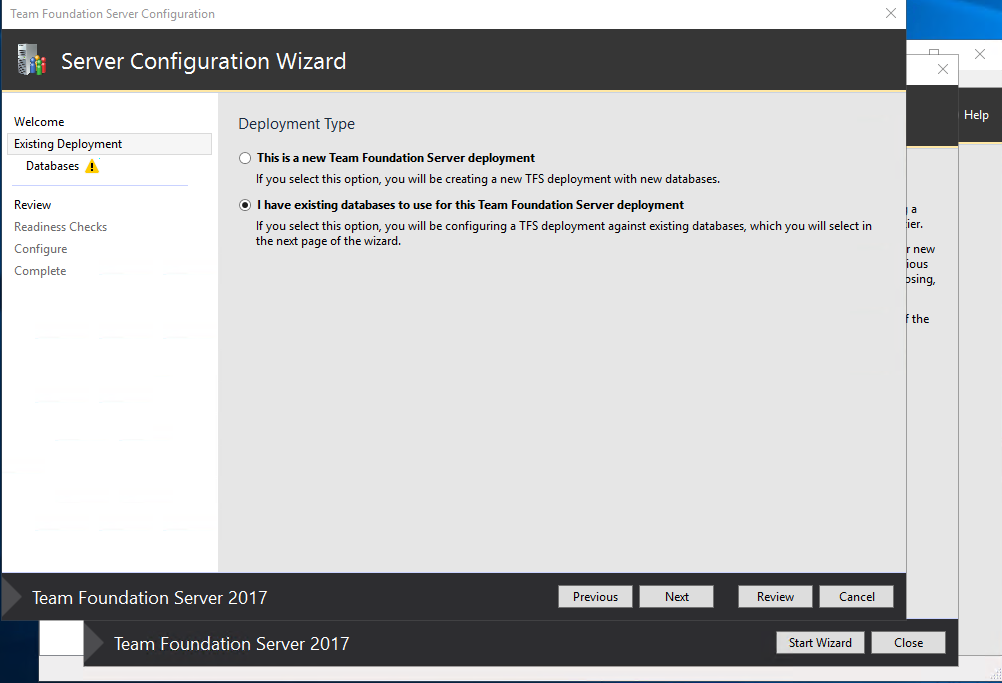
Click through the welcome to get to the Deployment Type selection. Select the I have existing… selection and click next.
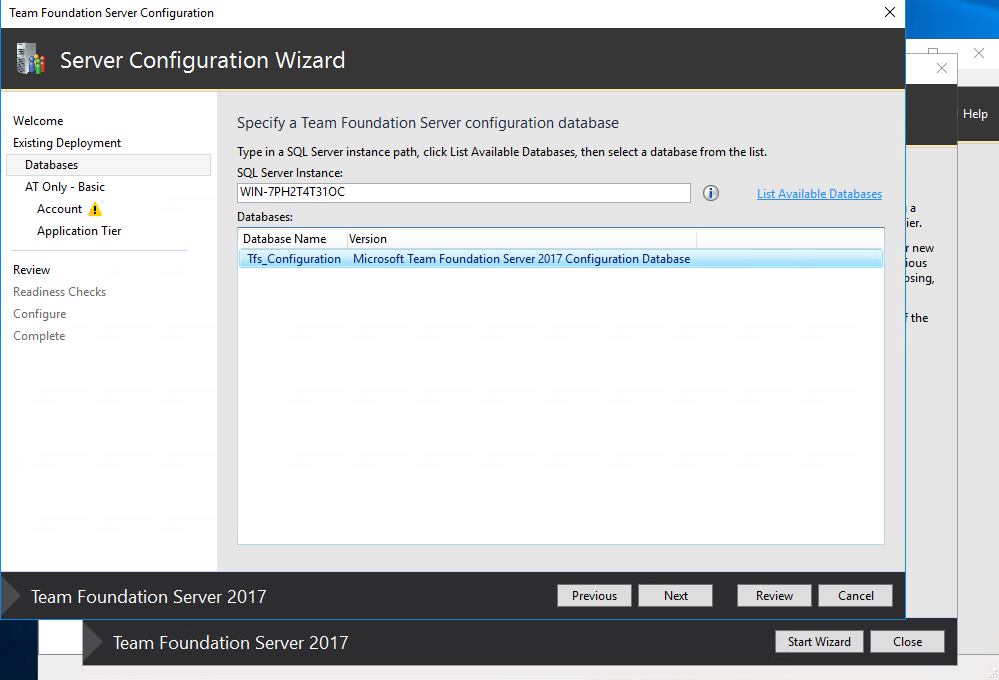
Select the correct SQL instance that the backups have been restored to and click next.
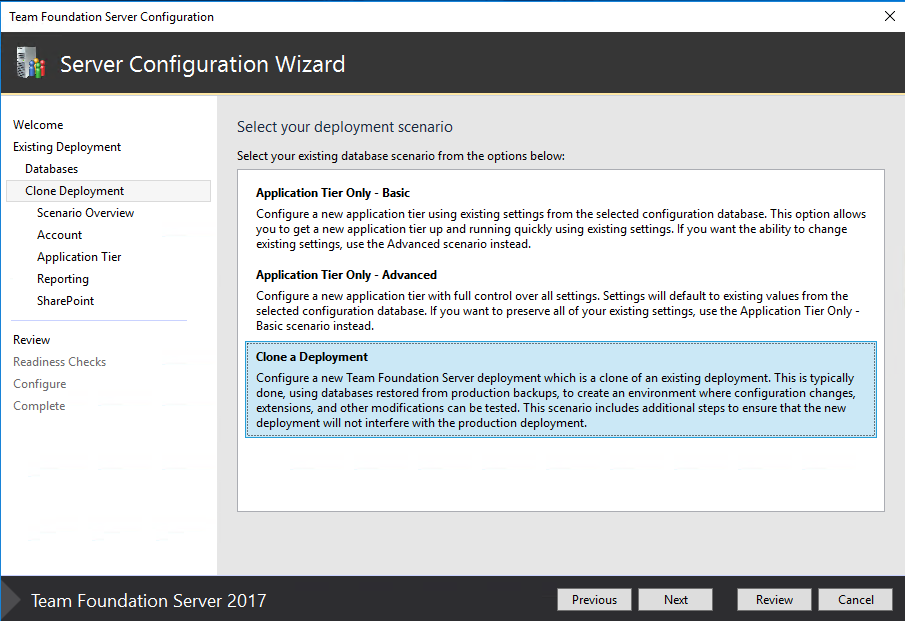
Select Clone a Deployment and click next.
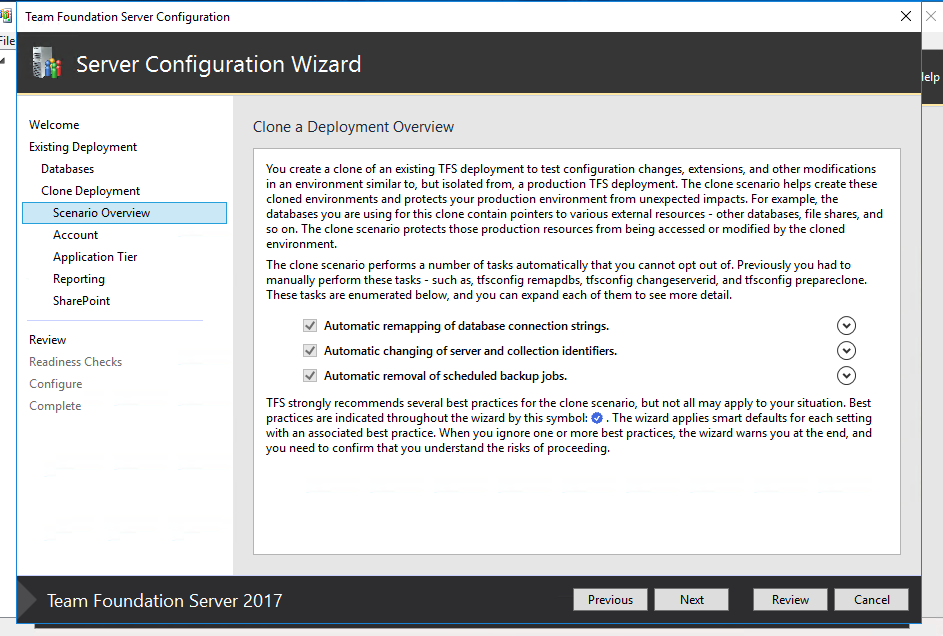
The next section will show the automatic processes that are done during the clone, which previously required manual run to prep for a clone. The application tier now does this automatically during a clone. Click next.
Provide the appropriate service account and click next.

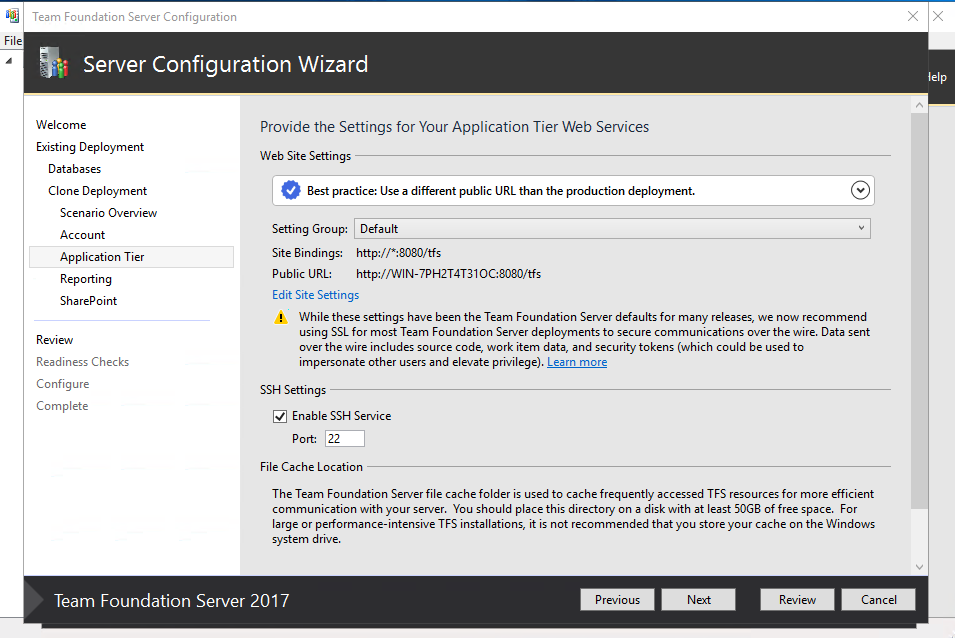
Provide the appropriate settings for your application tier, reporting, and SharePoint and continue to review.
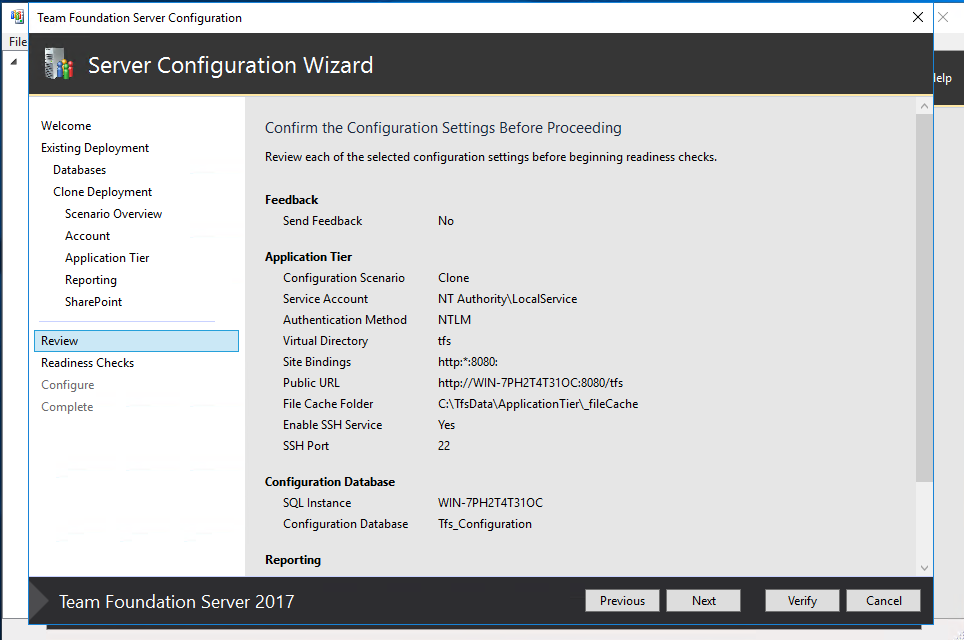
Review all configuration settings and continue to the readiness checks.
 25
25
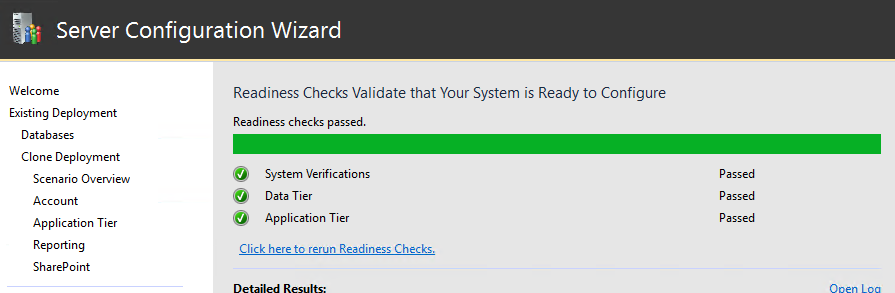
The readiness checks will now run. If successful, click Configure to complete the configuration.
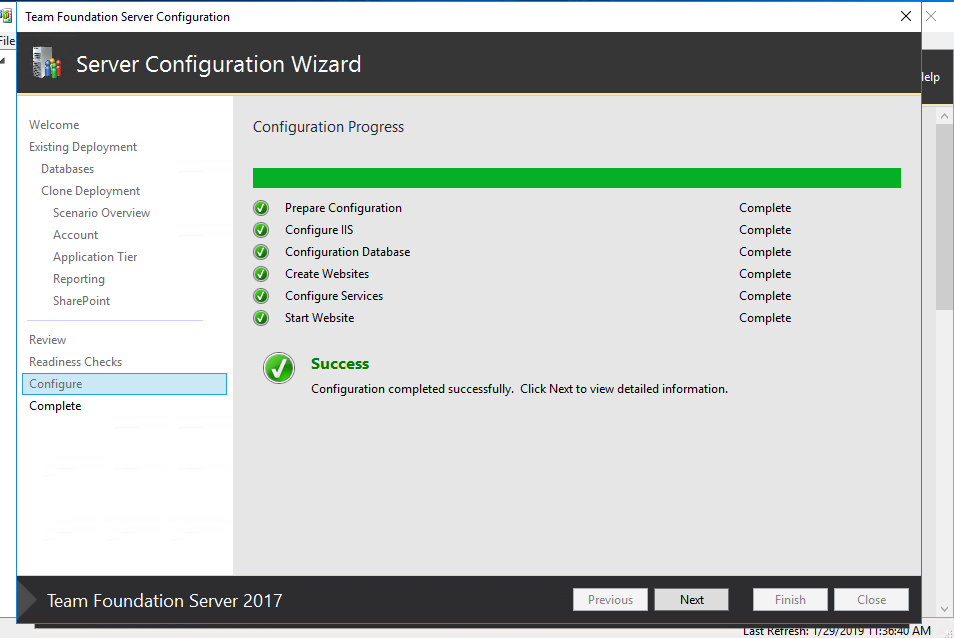
Your cloned instance should now be correctly configured. You can view more detailed results and view the configuration logs on the next screen. If needed, remember to reconfigure the new scheduled backups and clear cache. Navigate to the newly created TFS instance and verify permissions and successful installation.
In conclusion
The intent of this article is to serve as a basic guide to demonstrate using the new functionality in TFS 2017/2018 via the application tier to restore and configure a TFS backup, while moving or cloning a TFS instance. To plan a move or clone, please review and use the documented Microsoft processes listed throughout this article, as there might be additional steps needed to be taken that are different and specific to each TFS installation.
 Light
Light Dark
Dark
1 comment
Hi!
This is an excellent article that I’m bookmarking as a life-saving resource! I’m faced with a very similar dilemma with the exception that my current TFS is a TFS 2017.2 with SQL Server 2014 on single VM with a Windows Server 2008. I have no upgrade option as my company doesn’t allow Windows Server Upgrades.
I have a new VM with Windows Server 2016 and Azure DevOps 2019.0.1 ready to be installed. Also, I have a SQL Server 2017 AlwaysOn Cluster on a different VM set this time around.
I need to move my collections from the current setup to the new environment. I can not have the scenario where I have the same versions of TFS and SQL on the new environment and the restore. How do I go about this?