
Getting Started with Azure Blueprints
In this post, Premier Developer Consultants, Nicholas Switzer and Kunal Sinha, outline steps to integrate Azure Blueprints to quickly deploy and update your cloud environments.
If you’ve ever struggled with managing multiple deployment pipelines, Azure Blueprints now makes it possible for development teams to rapidly build and stand up new environments with a set of built-in components — such as networking — to speed up development and delivery.
Blueprints are a declarative way to orchestrate the deployment of various resource templates and other artifacts such as:
- Role Assignments
- Policy Assignments
- Azure Resource Manager templates
- Resource Groups
In this blog, we’ll be talking about how to get started with the Azure Blueprints service by creating and publishing blueprints.
Create a blueprint
- Select All services in the left pane. Search for and select Blueprints.
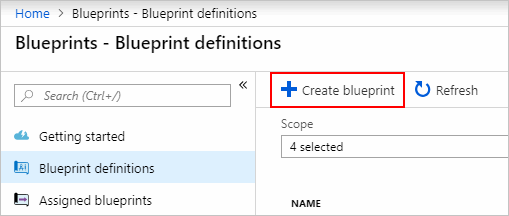
- Select Blueprint definitions from the page on the left and select the + Create blueprint button at the top of the page.
- Or, select Create from the Getting started page to go straight to creating a blueprint.
- Add a role assignment at the subscription level
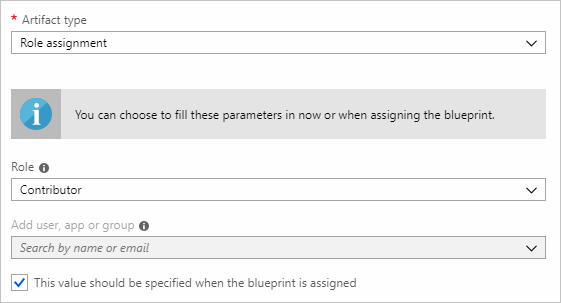
- Select the + Add artifact row under Subscription. The Add artifact window opens on the right side of the browser.
- Select Role assignment for Artifact type.
- Under Role, select Contributor. Leave the Add user, app or group box with the check box that indicates a dynamic parameter.
- Select Add to add this artifact to the blueprint.
Add policy assignments and resource groups using the same process if required. Once you have added the specifications you need for your blueprint, your completed blueprint should look like the following.
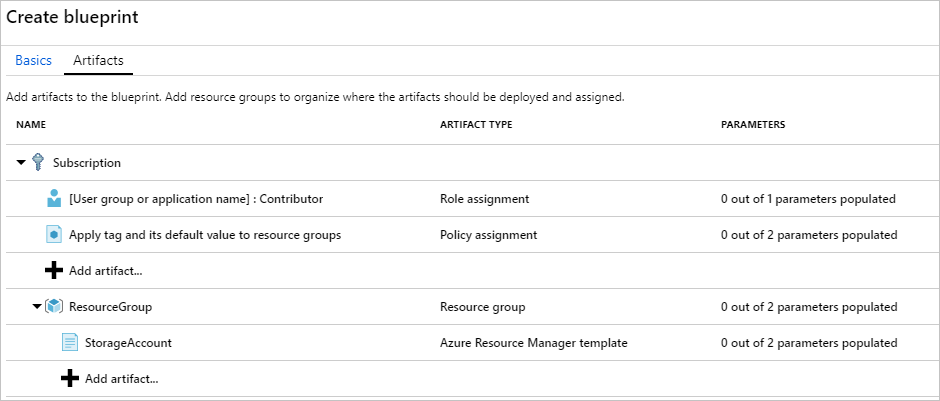
Notice that each artifact has x out of y parameters populated in the Parameters column. The dynamic parameters are set during each assignment of the blueprint.
Now that all planned artifacts have been added, select Save Draft at the bottom of the page.
Publish a blueprint
Publishing makes the blueprint available to be assigned to a subscription.
- Select Blueprint definitions from the page on the left.
- In the list of blueprints, right-click the one you previously created and select Publish blueprint.
- In the pane that opens, provide a Version (letters, numbers, and hyphens with a maximum length of 20 characters), such as v1. Optionally, enter text in Change notes, such as First publish.
- Select Publish at the bottom of the page.
Troubleshooting
Many errors will be the result of assigning a blueprint to a scope. When an assignment fails, the blueprint provides details about the failed deployment. This information indicates the issue so that it can be fixed and the next deployment succeeds. If you run into issues, reference this troubleshooting guide.
Summary:
As you can see, the process of creating and publishing blueprints is very customizable and straightforward and allows you to quickly deploy and manage your cloud environments. Blueprints also manage state when they’re published and can update existing artifacts back to their original state if they get modified. For more details, see references below.
References:
Azure Blueprints service – https://docs.microsoft.com/enus/azure/governance/blueprints/
 Light
Light Dark
Dark
0 comments