
Azure Active Directory: Automating Guest User Management
Application Development Manager Francis Lacroix discusses how to use Azure Automation and Microsoft Graph to determine which users are inviting guests into Azure Active Directory, audit guest logins, and disable unused guest identities.
While Azure AD offers many functions and features for managing Guest Users and their permissions, there are still some business specific processes that may not be supported. Though the use of Azure Automation and Microsoft Graph, it is possible to augment the built-in features to achieve business goals.
In this blog post, we will focus on two goals:
- Track and maintain the inviter for guests. We will be using the Manager field on the Azure AD Guest User to track the inviter. This will allow us to track and audit who has invited each guest user, and integrate this information into other processes.
- Audit Guest logins and disable unused guest users. We will be tracking logins for guest users, and if there are no logins in the past week, the guest user account will be disabled and and email sent to the inviter.
Assumptions
As with many custom solutions, there are multiple ways of approaching it. As this work is based on a Proof of Concept for a Premier Developer customer, the solution presented in this blog post is built around certain assumptions:
- Using an Automation Account. There are different means of building automated processes in Azure. Azure Automation was selected since it uses PowerShell, which is the primary audience at the customer. Azure Functions could have also been used.
- Using PowerShell Runbooks. Since the target audience was already comfortable with PowerShell, this was selected as the Runbook type.
- Using Azure AD PowerShell Module. Targeting the Microsoft Graph API directly would have worked also, but since this solution is built around PowerShell, we have opted to use the AzureAD PowerShell module.
The Scripts
For those simply interested in the scripts, they can be found here:
However, if you’re interested in setting up your Automation Account and understanding what is being done in the scripts, please read the rest of this post.
Building the Automation Account
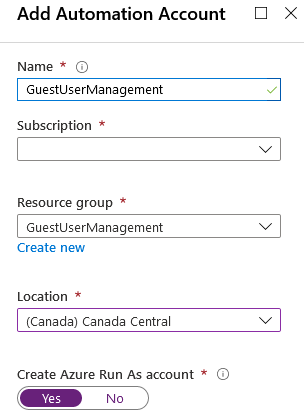
The first step is to create the Automation Account itself. If you have an existing Automation Account you want to use for this task, you can skip this step as long as it is properly configured. Creating an Automation Account is a straightforward process:
- Name: Provide a name for the Automation Account. We chose: “GuestUserManagement”.
- Subscription: Select the subscription to create the account in. Consider a subscription you have permissions to create resources in. Also, if you chose to create a “Run As Account” (more on this later), you will need to be Owner or equivalent on the subscription.
- Resource group: We created a new “GuestUserManagement” group, but any resource group you have the proper permissions to will work.
- Location: Select a Location.
- Create Azure Run As account: Selecting Yes will create a Service Principal, generate a self-signed certificate for it and assign it Contributor role on the subscription selected above. In order to create the Run As Account, you need to have permissions to create Service Principals in Azure AD and permissions to assign Contributor role in the subscription. If you select No, you will not require any of those permissions, but you will need to provide credentials used to connect to Azure AD when configuring the Automation account. We will provide instructions on how to do this when we discuss it.
For more information on Run As Accounts, please see: https://docs.microsoft.com/azure/automation/manage-runas-account
Configuring the Automation Account – PowerShell Modules
Once the Automation Account is created, we need to configure it before we can run our Runbooks (scripts). The first item we will configure is the PowerShell modules. As mentioned earlier, we will be using the AzureAD PowerShell module to perform our operations. Therefore, we will add it to the Automation Account.
First, in the Automation Account, navigate to the Modules page in the Shared Resources section.

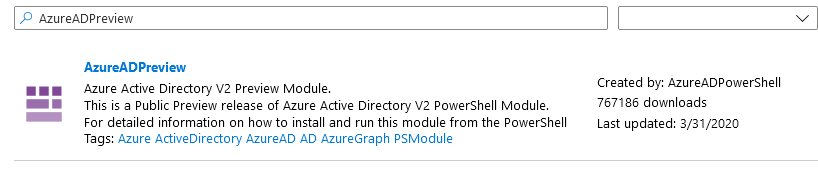
The AzureAD Module is part of the PowerShell Gallery, therefore you will need to select Browse gallery in the header bar.
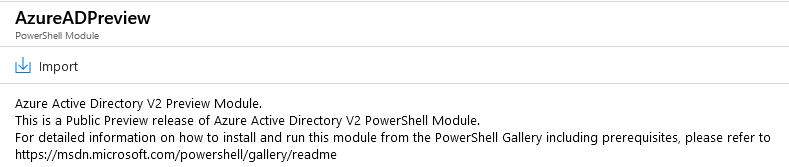
Once the Gallery page is open, search for AzureADPreview. Click on the entry shown, which will bring up the Module’s details. There, click Import, then OK. Note that this process can take several minutes.
The reason we are using the AzureADPreview rather than AzureAD module is based on the need for certain cmdlets (specifically Get-AzureADAuditDirectoryLogs and Get-AzureADAuditSignInLogs) which are only available in the Preview module when this post was originally written. Once these cmdlets are available in the non-preview module, please use the regular AzureAD module.
For more
![]()
Configuring the Automation Account – Connections & Certificates
The following section describes how to configure Connections and Certificates. If you chose Yes on the Create Azure Run As Account option when creating the Automation Account, then these will already be populated with entries called AzureRunAsConnection and AzureRunAsCertificate and this section can be skipped.
Connections
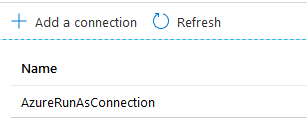
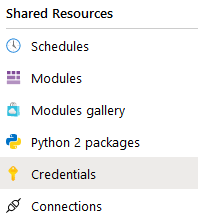
As a next step, we will configure the Connection used to connect to AzureAD. In the Automation Account, navigate to the Connections page in the Shared Resources section.

If you chose Yes on the Create Azure Run As Account option when creating the Automation Account, then this will already be populated with an entry call AzureRunAsConnection. If not, then you will need to create one by clicking Add a connection.
When creating a Connection, you will need to have a pre-existing Service Principal setup with a certificate. This is outside the scope of this blog post, but instructions can be found here: https://docs.microsoft.com/azure/active-directory/develop/howto-create-service-principal-portal. The Service Principal may need to be provided to you by someone else with permissions to create them.
To create the Connection, you will need to provide the following information:
- Name: This name will be used to identify the connection in the Runbook script.
- Type: Chose AzureServicePrincipal.
- ApplicationId: ID (GUID) of the Service Principal in Azure AD.
- TenantId: ID (GUID) of the Azure AD instance the Service Principal resides in.
- CertificateThumbprint: The thumbprint of the certificate used to create the certificate credentials for the Service Principal.
- SubscriptionId: ID (GUID) of the subscription this automation account resides in.
For more details, please see: https://docs.microsoft.com/azure/automation/automation-connections.
Certificates
In order for the Runbook to properly authenticate to Azure AD, it will also need access to the certificate identified by the thumbprint. In the Automation Account, navigate to the Certificates page in the Shared Resources section.
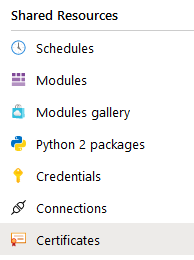
Again, if you chose Yes on the Create Azure Run As Account option when creating the Automation Account, then this will already be populated with an entry call AzureRunAsCertificate. If not, then you will need to create one by clicking Add a certificate.

You will need access to the certificate (self-signed or otherwise) used to create the Service Principal and whose thumbprint was provided in the Connection. When adding it to the automation account, provide the password used to protect the private keys and select if you want to make it exportable.
For more details, please see: https://docs.microsoft.com/azure/automation/shared-resources/certificates.
Configuring the Automation Account – Credentials
As part of the guest login auditing runbook, we will be sending an email to the guest inviter. Therefore, we will need to store credentials to an SMTP server. If you’re not interested in this feature, then feel free to skip this section.
In the Automation Account, navigate to the Credentials page in the Shared Resources section. Select Add a credential.
To create the Credential, you will need to provide the following information:
- Name: This name will be used to identify the credentials in the Runbook script. We chose “EmailCredentials” for this blog post.
- User name: The user name used to connect to the SMTP server.
- Password: The password used to connect to the SMTP server.
Keep in mind that all credentials (as well as Connections, Certificates and protected Variables) are encrypted when stored, using a system managed key stored in a system managed Key Vault.
For more details on Credentials, please see: https://docs.microsoft.com/azure/automation/shared-resources/credentials.
Configuring the Automation Account – Variables
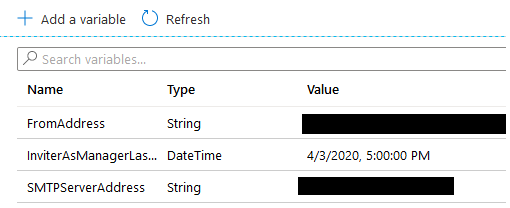
We will be creating three variables. Two will hold information about the SMTP server used to send email to guest user inviter, and one will be used to hold information about the last successful run of the scripts.
In the Automation Account, navigate to the Variables page in the Shared Resources sections. Select Add a variable.

To create the variables, you will need to provide the following information:
- Name: This name will be used to identify the variables in the Runbook script. We created three variables, with the names “SMTPServerAddress”, “FromAddress” and “InviterAsManagerLastRun”.
- Type: The data type of the variables. We selected “String” for both variables, but this is case specific.
- Value: The value of the variables.
- Encrypted: Whether the variables are to be encrypted. Encrypted variable values cannot be read after they are created. They can only be updated.
For more details on Variables, please see: https://docs.microsoft.com/azure/automation/shared-resources/variables.
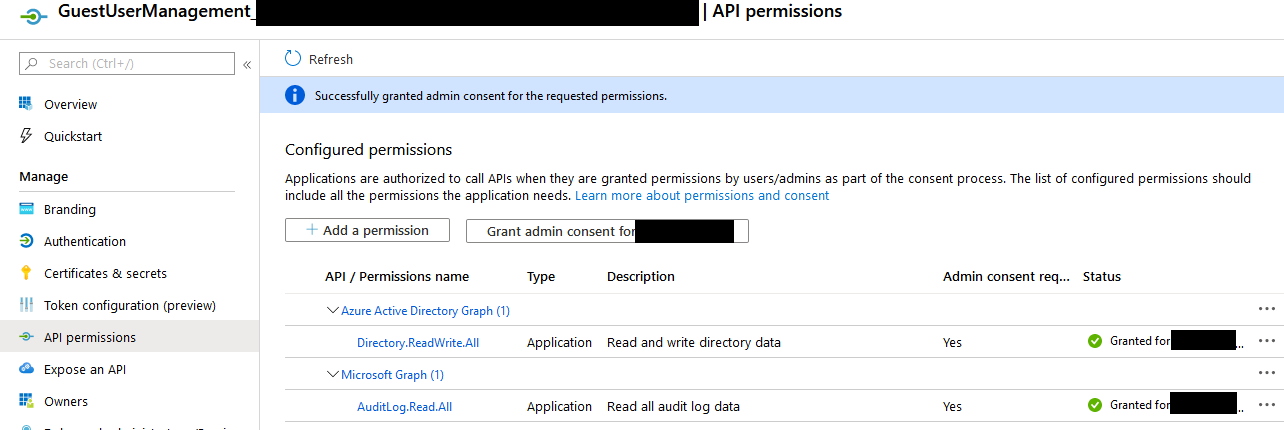
Configuring the Service Principal Permissions
Before we can author the Runbooks, or more specifically, before we can run them, we will need to provide the Service Principal which is used for connecting to Azure AD with the proper permissions. This will be done within Azure AD; depending on your permissions, you may need someone else to perform this task.
In Azure Active Directory, navigate to the App Registrations section. In App Registration, find the Service Principal specified in the above connection. If you chose to have the Azure Run As Account created with the Automation Account, the App Registration will start with the name of the Account and have a random string appended. In our example, the Service Principal is “GuestUserManagement_<RandomString>”.
Once you have your App Registration selected, navigate to API Permissions, click “Add Permissions”, and add the permissions listed below.
Creating the Runbooks – Set Inviter as Manager
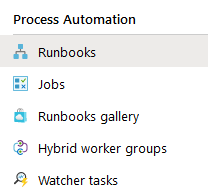
Now that we’ve configured the Automation Account, we need to create the Runbooks, which will contain and execute the scripts we will be building. Navigate to Runbooks under Process Automation in the Automation Account. Note that there are three sample runbooks present in new Automation Accounts. We will ignore these for the purpose of this blog post.
Click Create a Runbook, and provide the following information:
- Name: Chose a clear name for this Runbook. We chose “SetInviterAsManager”.
- Runbook type: Choose PowerShell.
- You will now be presented with the script authoring window. The full script can be found here: SetInviterAsManager.ps1, but I will walk through its parts.
Runbook Variables
The first part of the script sets the variables used in the rest of the script, providing easy access for later editing if needed. These could also be moved to Runbook Variables if desired.
# Set the variables for this Runbook
$connectionName = "AzureRunAsConnection"
$lastRunVariableName = "InviterAsManagerLastRun"
The connectionName is simply the name of the Connection created in the Automation Account in the previous steps. Similarly, lastRunVariableName is the variable name used to hold the last successful run of the script.
Connect to Azure AD
This next part of the script connects to Azure AD using the Service Principal setup in the Connection specified in the variable above. This connection will be used to perform all the operation against Azure AD.
# Connect to Azure AD
try {
  Get the connection for this runbook
  $servicePrincipalConnection = Get-AutomationConnection -Name $connectionName

  # Connect to Azure AD using the Service Principal
  Write-Output "Logging in to Azure AD"

  Connect-AzureAD -TenantId $servicePrincipalConnection.TenantId `
    -ApplicationId $servicePrincipalConnection.ApplicationId `
    -CertificateThumbprint $servicePrincipalConnection.CertificateThumbprint
}
catch {
  if (!$servicePrincipalConnection) {
    $ErrorMessage = "Connection $connectionName not found."
    throw $ErrorMessage
  } else {
    Write-Error -Message $_.Exception
    throw $_.Exception
  }
}
Get the Last Successful Run Date and Time
Once we’ve connected to Azure AD, we’ll query the variable holding the date and time of the last successful run, and build a filter based on this value.
# Get the last successful run date and time
try
{
  # Get the variable holding the last successful run
  $lastRunDateTime = Get-AutomationVariable -Name $lastRunVariableName

  # Create the required filter.
  $queryStartDateTimeFilter = '{0:yyyy-MM-dd}T{0:HH:mm:sszzz}' -f $lastRunDateTime
}
catch {
  if (!$lastRunDateTime) {
    $ErrorMessage = "Variable $ lastRunVariableName not found."
    throw $ErrorMessage
  } else {
    Write-Error -Message $_.Exception
    throw $_.Exception
  }
}
The queryStartDateTimeFilter will be used when calling the Get-AzureADAuditDirectoryLogs cmdlet. The cmdlet uses oData v3.0 filter statements, therefore we’re formatting the date/time filter to that format.
Get the Newly Added Users
Once we have a connection to Azure AD and our query filter, we need to query Azure AD for all Guest Users added since the last run of the script.
# Get the logs for all newly added users
Write-Output "Getting Audit Logs"
$queryStartDateTime = Get-Date()
$addedUserEvents = Get-AzureADAuditDirectoryLogs `
  -Filter "ActivityDisplayName eq 'Add user' and ActivityDateTime ge $queryStartDateTimeFilter"
We first get the current date and time since we want to avoid missing guest users added after we run the query but before we finish processing the results of the query. This is unlikely since this is a short script, but it is a good precaution. Note that we use the “Add User” event, rather than one of the Guest User specific ones. The reason is simple: the guest user events don’t have the inviter information in the event data. But the Add User does. We’ll just have to separate the guests from members.
Process the Results of the Query
Once we have a collection of users added to Azure AD since the last run of the script:
- Iterate over the collection
- Extract the ID of the initiator (inviter)
- Get the added user’s object out of Azure AD
- Check to see if it’s a Guest based on its UserType
- If so, set the Manager in Azure AD to be the Inviter
# Processing added users
foreach ($addedUserEvent in $addedUserEvents) {
  Write-Output "Processing added user event"

  # Get the inviter reference from the InitiatedBy field
  $inviterId = $addedUserEvent.InitiatedBy.User.Id

  # For each TargetResources, check to see if it's a guest user, and if so, add its Manager
  foreach ($targetResource in $addedUserEvent.TargetResources) {
    Write-Output "Processing target resource"
    $addedUser = Get-AzureADUser -ObjectID $targetResource.Id

    if ($addedUser.UserType -eq "Guest") {
      Write-Output "Setting manager on guest user"
      Set-AzureADUserManager -ObjectID $addedUser.ObjectId -RefObjectID $inviterId
    }
  }
}
Update the Last Run Variable
Finally, we update the InviterAsManagerLastRun variable to the date and time saved before we queried Azure AD Logs
try {
  # Get the variable holding the last successful run
  Set-AutomationVariable -Name $lastRunVariableName -Value $queryStartDateTime
}
catch {
  Write-Error -Message $_.Exception
  throw $_.Exception
}
Creating the Runbooks – Audit Guest User Logins
Now that we have a script to set the Manager on Guest Users, we will create another Runbook to audit inactive users, disable them and email inviters. Navigate back to Runbooks and create another Runbook. We named this one “MonitorInactiveGuestAccounts”. The full script can be found here: MonitorInactiveGuestAccounts.ps1.
Runbook Variables
Like the previous script, the first part of this script sets the variables used in the rest of the script, providing easy access for later editing if needed. Some of these could also be moved to Runbook Variables if desired.
# Set the variables for this Runbook
$connectionName = "AzureRunAsConnection"
$emailCredentialsName = "EmailCredentials"
$smtpServerVariableName ="SMTPServerAddress"
$fromAddressVariableName = "FromAddress"
$queryStartDateTime = (Get-Date).AddDays(-7)
$queryStartDateTimeFilter = '{0:yyyy-MM-dd}T{0:HH:mm:sszzz}' -f $queryStartDateTime
$subject = "Inactive guest user - {0}"
$body = "{0} has been inactive for over 7 days. Please validate that {0} requires guest access and if not, remove them."
The queryStartDateTimeFilter will be used to query for the last 7 days of login information (Azure keeps 30 days). The subject and body variables will have their placeholder replaced later in the script.
Connect to Azure AD and get the credentials and variables
This next part of the script connects to Azure AD using the Service Principal setup in the Connection specified in the variable above. We also get the mail credentials and the mail variables.
# Get the Connection
try {
  # Get the connection for this runbook
  $servicePrincipalConnection = Get-AutomationConnection -Name $connectionName

  # Connect to AzureAD using the Service Principal
  Write-Output "Logging in to AzureAD"
  Connect-AzureAD -TenantId $servicePrincipalConnection.TenantId `
    -ApplicationId  $servicePrincipalConnection.ApplicationId `
    -CertificateThumbprint $servicePrincipalConnection.CertificateThumbprint
}
catch {
  if (!$servicePrincipalConnection) {
    $ErrorMessage = "Connection $connectionName not found."
    throw $ErrorMessage
  } else {
    Write-Error -Message $_.Exception
    throw $_.Exception
  }
}

# Get the email Credentials
try {
  # Get the credentials for email
  $emailCredentials = Get-AutomationPSCredential -Name $emailCredentialsName
}
catch {
  if (!$emailCredentials) {
    $ErrorMessage = "Credentials $emailCredentials not found."
    throw $ErrorMessage
  } else {
    Write-Error -Message $_.Exception
    throw $_.Exception
  }
}

# Get the email variables
try {
  # Get the variable holding the last successful run
  $smtpServer = Get-AutomationVariable -Name $smtpServerVariableName
  $fromAddress = Get-AutomationVariable -Name $fromAddressVariableName
}
catch {
  if (!$smtpServer) {
    $ErrorMessage = "Variable $smtpServerVariableName not found."
    throw $ErrorMessage
  } elseif (!$fromAddress) {
    $ErrorMessage = "Variable $fromAddressVariableName not found."
    throw $ErrorMessage
  } else {
    Write-Error -Message $_.Exception
    throw $_.Exception
  }
}
Get the Newly Added Users
Once we have a connection to Azure AD, we need to get a list of all the active guest users in Azure AD.
# Get all the Guest Users
$guestUsers = Get-AzureADUser -Filter "UserType eq 'Guest' and AccountEnabled eq true"
The filter used enables us to query for Guest Users (since this limitation only applies to them), and those that are enabled (or those in the Azure Portal where the sign in isn’t blocked). We wan’t to avoid re-sending an email notification every script run, therefore once the Guest User has been disabled, we will no longer process them.
Process the Results of the Query
Once we have a collection of active guest users:
- Iterate over the collection
- Check to see if there’s an entry in the Sign In logs for that user in the last 7 days. If not:
- Disable the account (set AccountEnabled to false)
- Get the guest user’s manager
- Send an email to the manager
# For each Guest user, validate there is a login in the last week
foreach ($guestUser in $guestUsers) {
  Write-Output "Getting User's logins for the last week"
  $guestUserSignIns = Get-AzureADAuditSignInLogs -Filter "UserID eq '$($guestUser.ObjectID)' and createdDateTime ge $queryStartDateTimeFilter"

  if ($guestUserSignIns -eq $null) {
    Write-Output "No logins, blocking sign-in and sending email to manager"

    # Block Sign-In
    Set-AzureADUser -ObjectID $guestUser.ObjectID -AccountEnabled $false

    # Get the manager
    $manager = Get-AzureADUserManager -ObjectID $guestUser.ObjectID

    # Format the subject and body
    $targettedSubject = $subject -f $guestUser.DisplayName
    $targettedBody = $body -f $guestUser.DisplayName
    Send-MailMessage -To $manager.OtherMails[0] -Subject $targettedSubject -Body $targettedBody `
      -From $fromAddress -SmtpServer $smtpServer -Credential $emailCredentials `
      -Port 587 -UseSSL
  }
}
Scheduling The Runbooks
Now that we have the Runbooks defined, the final step consists of scheduling them to run automatically. Each runbook will run on a separate schedule:
- SetInviterAsManager will run hourly
- MonitorInactiveGuestAccounts will run daily
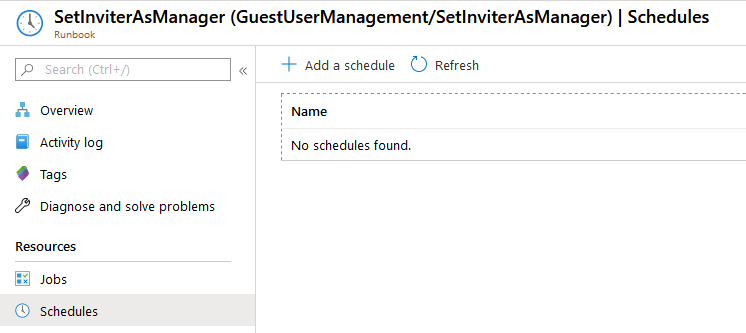
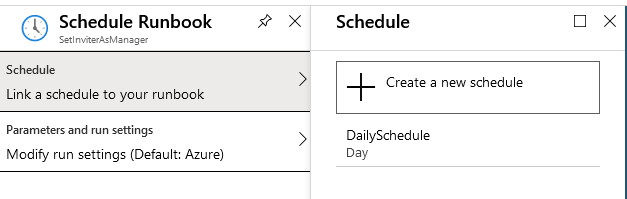
For each Runbook, go to its Schedules page under the Resources section. Click Add a schedule. This will bring up the schedule selection box.
Click on the Schedule box. If this is an existing Automation Account, there may be schedules you can use. Otherwise, we’ll need to create the schedule. If you can use an existing schedule, simply click it. Otherwise, click Create a new schedule.
To create a new schedule, provide the following information:
- Name: A descriptive name for the schedule
- Starts: The start date and time of the schedule. Needs to be in the future.
- Recurrence: If you want this schedule to reoccur on a specific frequency. For this use case, we will select Recurring for both schedule, with one set to Recur every 1 Hour and the other set to Recur every 1 Day.

Select the appropriate Schedule for each
Closing Comments
Using the various tools at our disposal, it is possible to extend the features around Guest Users and automate part of the management. Hopefully these two scripts can serve as a foundation for further development on your part.
 Light
Light Dark
Dark
3 comments
Very detailed! thanks for the break down. I also wrote something for this a couple of weeks ago and removed inactive users and expired guest (+90 days without acceptance)
https://github.com/JBines/Remove-StaleGuests
Br.
Josh
Hi,
nice tool. very handy. However, pls help me with the error i get;
Set-AzureADUserManager : Cannot bind argument to parameter ‘RefObjectId’ because it is null. At line:69 char:79 + … reADUserManager -ObjectID $addedUser.ObjectId -RefObjectID $inviterId + ~~~~~~~~~~ + CategoryInfo : InvalidData: (:) [Set-AzureADUserManager], ParameterBindingValidationException + FullyQualifiedErrorId : ParameterArgumentValidationErrorNullNotAllowed,Microsoft.Open.AzureAD16.PowerShell.SetUserManager
and
Set-AzureADUserManager : Cannot bind argument to parameter ‘RefObjectId’ because it is null. At line:69 char:79 + … reADUserManager -ObjectID $addedUser.ObjectId -RefObjectID $inviterId + ~~~~~~~~~~ + CategoryInfo : InvalidData: (:) [Set-AzureADUserManager], ParameterBindingValidationException + FullyQualifiedErrorId : ParameterArgumentValidationErrorNullNotAllowed,Microsoft.Open.AzureAD16.PowerShell.SetUserManager
Any idea how this can be fixed?
I think it has to do with error handling…..as some of the users it is working.
Thanks in advance.
BR
Martijn
Another remark:
how to avoid that this user is showing now in the org chart of Teams/ SPO ?