
Investigating Memory Leaks in Azure Web Sites with Visual Studio 2013
One of the cool new features in Visual Studio 2013 is the ability to analyze managed memory issues. Recently, Azure Web Sites added support to programmatically get mini-dumps and “diagsession” files that have heap information from Azure Web Sites in production. In this walkthrough, I’ll show you how to combine these two new features to form a cool end to end scenario for investigating memory leaks in production Azure Web Sites using a little PowerShell.
Set up an Azure Web Site using Git
I’m going to start from scratch with setting up a new website using git deployment. The key takeaways from this first section is that you need to know the deployment credentials because those will be the same credentials we use to grab a heap dump of the website’s process.
First, let’s install git. I think the easiest way to do this is to use chocolatey, a great package manager built on nuget. Run the following command from an elevated command prompt (not PowerShell) to get chocolatey on your machine:
@powershell -NoProfile -ExecutionPolicy unrestricted -Command
"iex ((new-object net.webclient).DownloadString('https://chocolatey.org/install.ps1'))"
&& SET PATH=%PATH%;%systemdrive%chocolateybin
Now that we have chocolatey, we can quickly install the git package.
cinst git
Start VS2013 and create a new MVC 4 application. Accept the defaults and build. It doesn’t really matter what site you use here as long as you know it works. Now it is time to deploy it to an Azure Web Site with git. In an elevated powershell, change to the folder that contains the app:
Cd C:usersYOURUSERIDdocumentsvisual studio 2013projectsMyApp
Create a new local repo and add and commit the web site you want to deploy to it:
git init
git add .
git commit –m “initial commit”
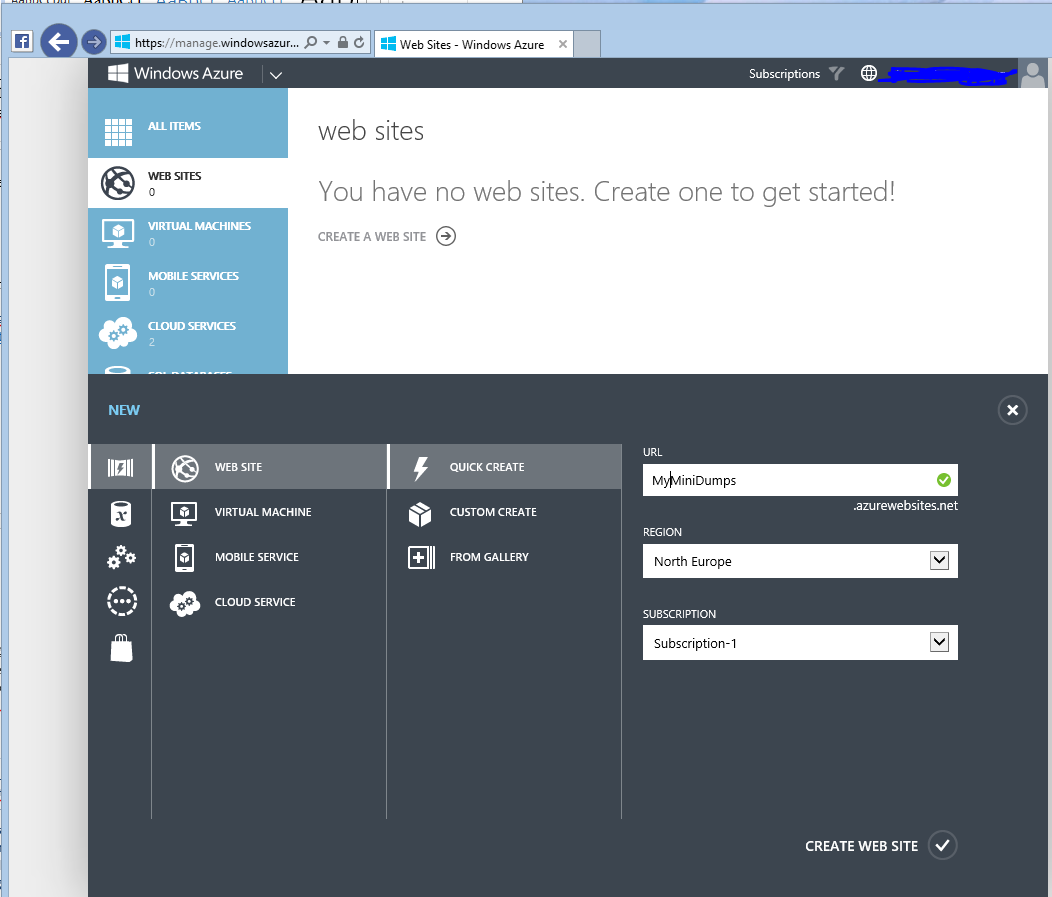
Open a browser and navigate to the Azure management portal. Create a new Azure Web Site:
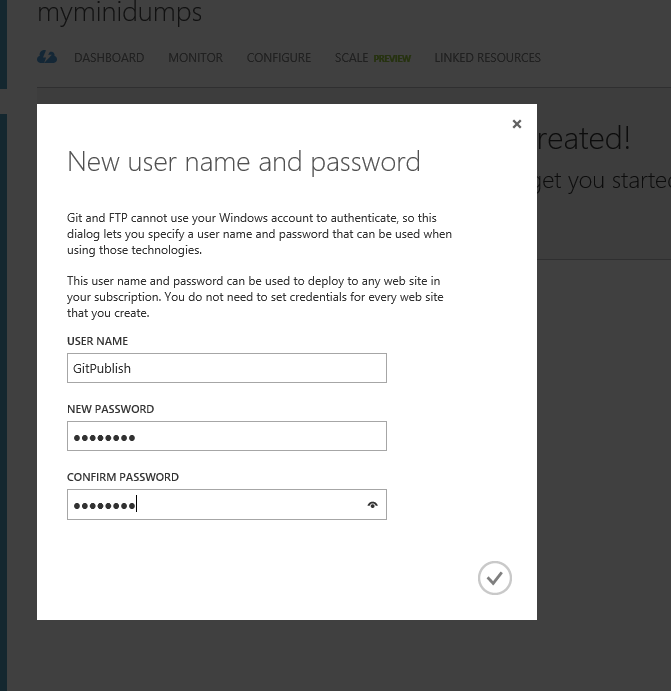
Once the site has been created, it is time to set up the deployment credentials so you can actually publish your site. From the dashboard, select “Set up deployment credentials”.

It will ask you for a user name and password combination for Git deployments. Note it down. This will be the same credentials that are used to access minidumps and other diagnostic information in later steps.
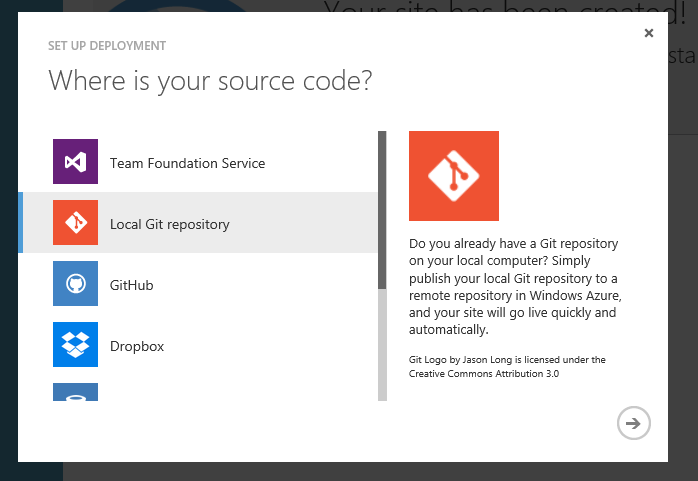
Go back to the Dashboard and select “Set up deployment from source control.” Choose Local Git repository. Azure will create a repo for you to target.
Move back to PowerShell and follow the instructions that you get from Azure.
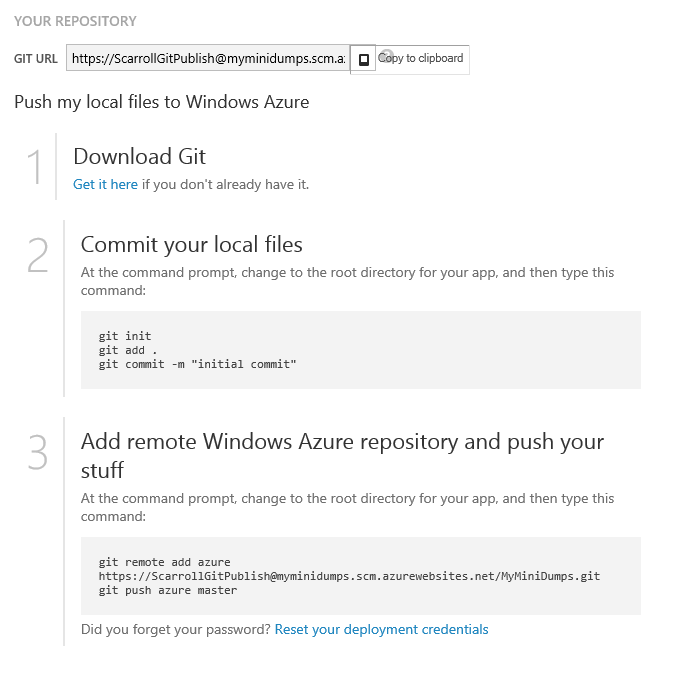
Once you’ve completed the deployment you should test to make sure you can hit your new web site. Make note of the prefix of the URI that your git publish is targeting. In my example, it is http://myminidumps.scm.azurewebsites.net/ . This is going to be the base URI for all the REST APIs you call.
Calling the Diagnostics REST APIs from PowerShell
Let’s start by grabbing the diagnostic counters from the Diagnostics REST APIs. We’ll do this with the Invoke-WebRequest PowerShell cmdlet. The API documentation is located here: https://github.com/projectkudu/kudu/wiki/Process-Threads-list-and-minidump-gcdump-diagsession. The most basic call is to /diagnostics/processes which will return several important counters about the w3wp.exe process running your website. I take the returned content and format it nicely by piping to the ConvertFrom-Json cmdlet:
(Invoke-WebRequest –uri https://mysite.scm.azurewebsites.net/diagnostics/processes/0 –credential mycredential).Content | ConvertFrom-Json
It should look something like this:

Notice all the great memory counters which could point us to a leak. Knowing that you have a leak is a great first step but how would you investigate the cause? You actually have two options in the current version of Azure Web Sites: full heap dumps and managed gcdumps. Heaps dumps are complete snapshot of the state of the process at the time you issue the dump command via REST. GCDump files are compressed and don’t have the ability to inspect the heap itself but has the complete reference graph which should be sufficient to track down most leaks. The major advantage of GCDump files is that they are small and should work well with the Free tier of Azure Web Sites. We’ll use GCDumps for this walkthrough.
Getting the managed heap file
The URL for taking a GCDump of a process is /diagnostics/processes/0/gcdump. The outfile parameter to the powershell snippet below specifies where to write the dump. We are using the .diagsession extension so VS will know to open it as a managed memory file.
Invoke-WebRequest -uri https://<Website>.scm.azurewebsites.net/diagnostics/processes/0/gcdump
-credential <InsertDeploymentUserIdFromAboveHere> -outfile .dump.diagsession
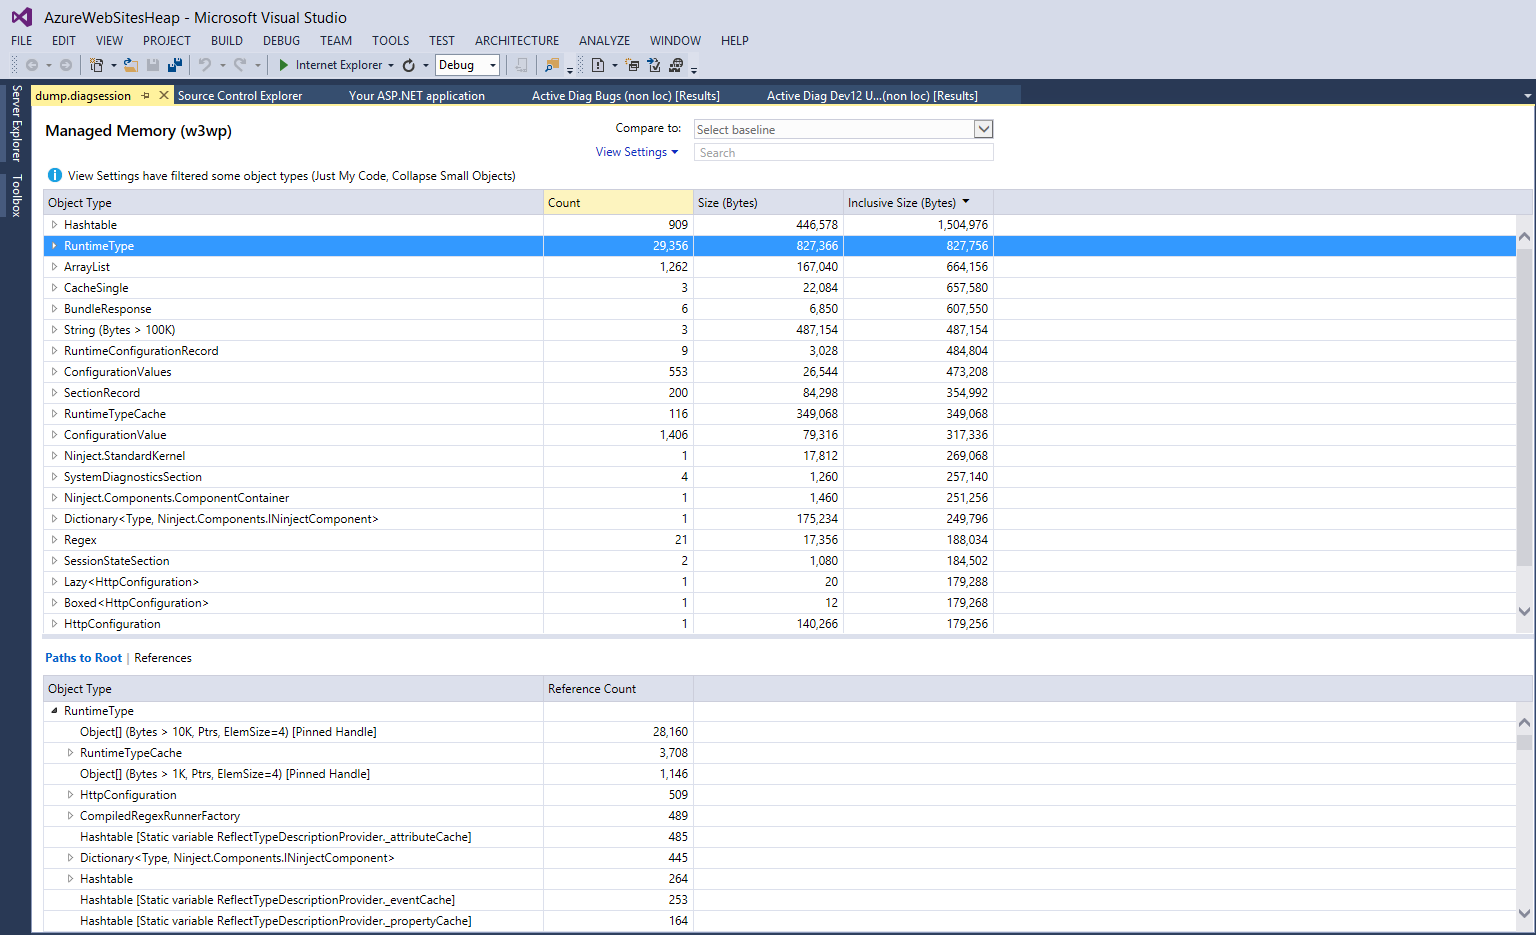
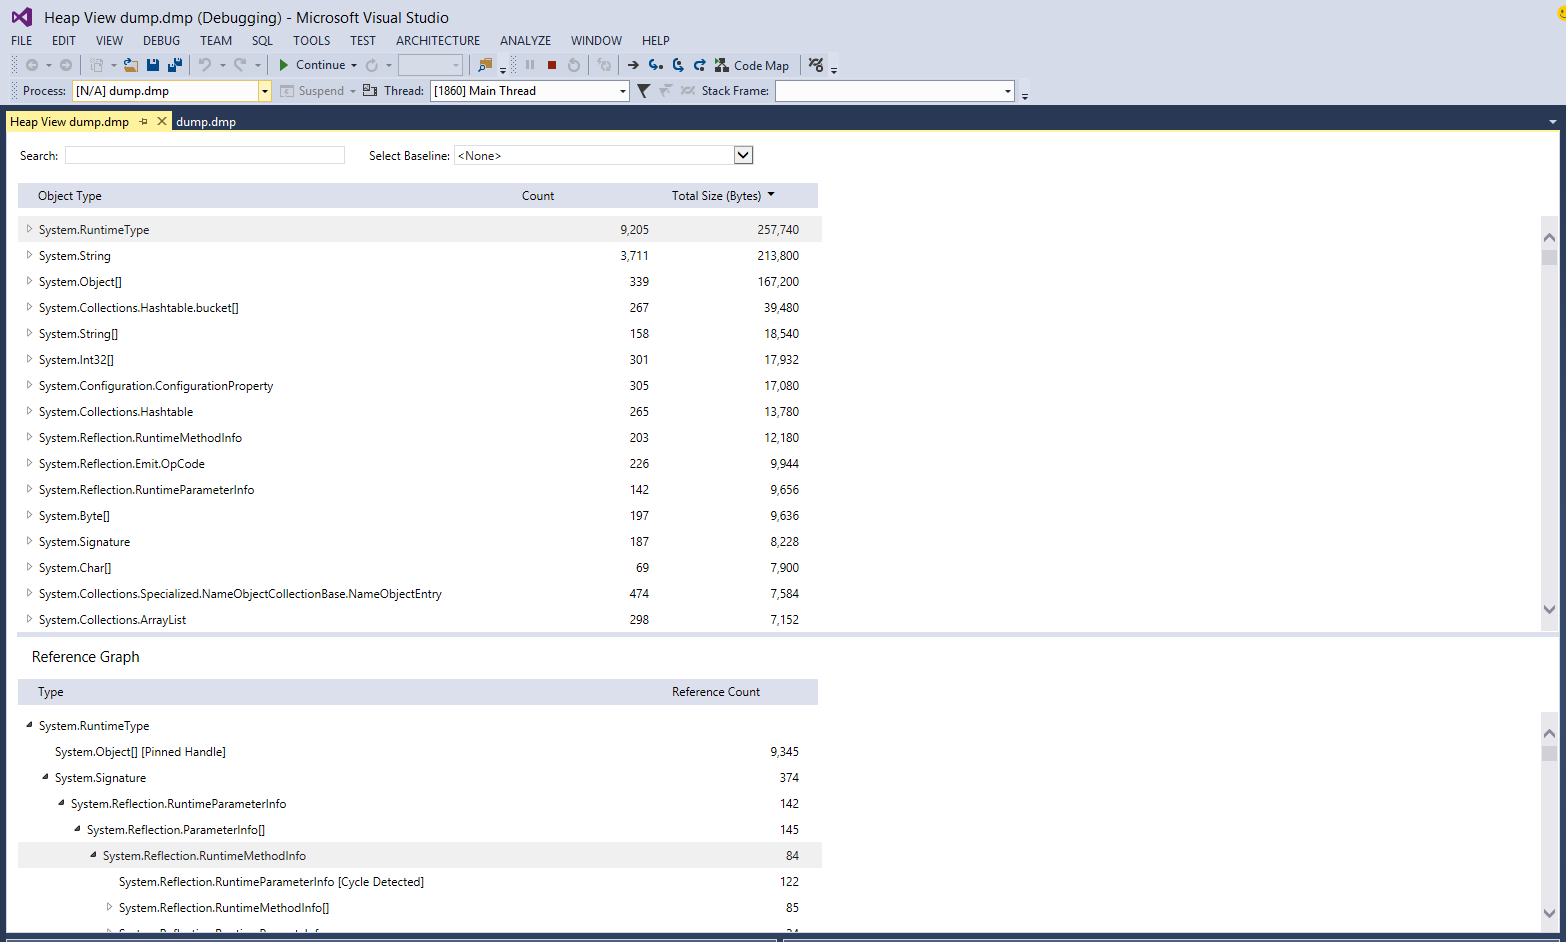
Once you have the dump file, switch back to Visual Studio. Choose File->Open and your diagsession file location. You should now see something that looks like the screenshots below that lets you drill in to each type to see the size of each instance and in the pane below you can drill into the references that are keeping objects of that type alive.
Hopefully this tutorial will get you started with finding memory leaks in your Azure Web Sites.
To learn more about how to do memory analysis with these tools, check out Andrew’s blog post here for much more info.
As always, we look forward to your feedback in the comments.
Update:
If you update to CTP 1 (or later) of the Spring Update of Visual Studio 2013, we’ve added a small enhancement that makes this scenario much better. The easiest way to identify a leak is usually to compare two diagsession files and see what has changed between them. This helps you narrow in on the largest change directly instead of opening two files up and comparing them manually. It’s super simple. Just make sure you follow the instructions above to get a diagsession file. Allow the leak to accumulate for a while using the technique above for monitoring the size of the memory counters (private_memory or virtual_memory are good clues) then take another snapshot.
Open the later of the two files as before but now you can select “Compare To->Browse…” in order to compare to the baseline you took.

Now, you should see several new columns for the difference between the number and size of each type. I usually sort on Size in bytes to try to identify which types are leaking.

 Light
Light Dark
Dark
0 comments