
Configuring Authentication and Authorization for REST APIs using Azure AD B2C ID Tokens
Overview
Our partner implemented Azure Active Directory B2C (AD B2C) for the authentication mechanism of their website and APIs. When a user accesses the website, they are redirected to a login page, where they must enter an email and a password and respond to a Two-Factor Authentication (TFA) message on their phone. After successfully authenticating via AD B2C, a token is issued and the user is able to access the website and call any APIs for which their account is authorized.
This works well for a website. However, the fact that it requires user interaction makes it inappropriate for an unattended process, such as when running End-to-End or Integration Tests. For these use cases, we need a different method.
The ID Token authentication method we chose removed the need for TFA, making it inherently less secure than what they are using to secure their web site. For our End-to-End tests, we considered alternative authentication mechanisms, such as Access Tokens and Managed Service Identities. This would have required them to implement a second authentication mechanism for their backend service, which they did not wish to do.
Authentication Tokens
A JSON Web Token (JWT) is a standard way of validating authentication. A JWT is encoded JSON that verifies the identity of a user from a trusted source and that contains claims about that user, such as name and email address.
The partner used AD B2C as the trusted source to authenticate each user and provide a token. A set of APIs within the partner organization required passing a token in the header before they can be accessed. The diagram in Fig. 1 shows the calls that need to be made to acquire a token and pass that token to the API.
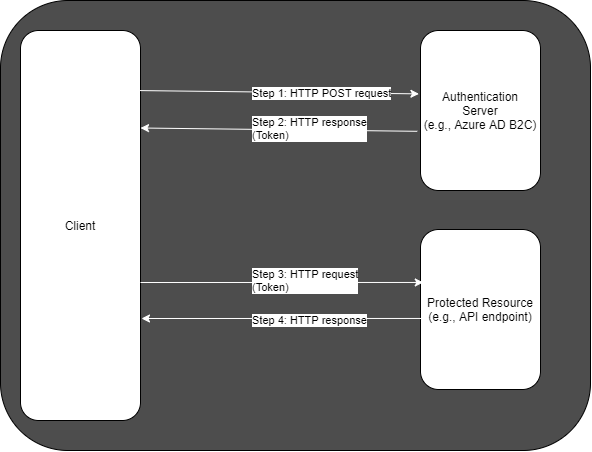 Fig. 1
The sequence shown in the above diagram is:
Step 1: The client sends a request to a trusted authority, such as AD B2C. Step 2: The trusted authority validates the credentials sent in the request. If validated, it returns a token in the response body. Step 3: The client includes the token in a request to a secured resource. Step 4: The resource accepts the token and responds appropriately.
The Challenge
The partner was insistent that an AD B2C ID Token be used for automated tests because it reflects the authentication mechanism used by the website. We needed a way to retrieve a token from AD B2C without any user interaction.
Multiple teams within the partner organization tried to resolve this issue without success.
AD B2C allows you to create users and authenticate those users against a variety of Identity Providers. Because AD B2C supports standards such as oAuth 2.0 and OpenID, many different providers can be used. Most of these providers expect some user interaction, such as entering a user name and password. This does not work well if we want to create an automated process that calls a REST API that requires Authorization. In this case, we need to create a flow to support this scenario.
This requires the following steps in Azure Active Directory B2C:
- Create a User Flow
- Create a Test User
- Configure User Role
- Register an Application
NOTE: An Access Token is usually more appropriate for application-to-application calls like this (see the Things to Consider section). However, the partner was using ID Tokens to access their user interface and wanted to use the same method in the end-to-end tests.
Create Flow
A User Flow defines the policies and steps that are required for an application to authenticate a user. AD B2C includes templates for flows, but some of these require some user interaction, such as entering a username and password and responding to TFA requests. However, the Resource Owner Password Credential (ROPC) template requires no user interaction, so a User Flow based on this template is ideal for our scenario. Let us walk through the steps to create an ROPC flow.
To begin, log into the Azure Portal and navigate to the Azure AD B2C page, as shown in Fig. 2.
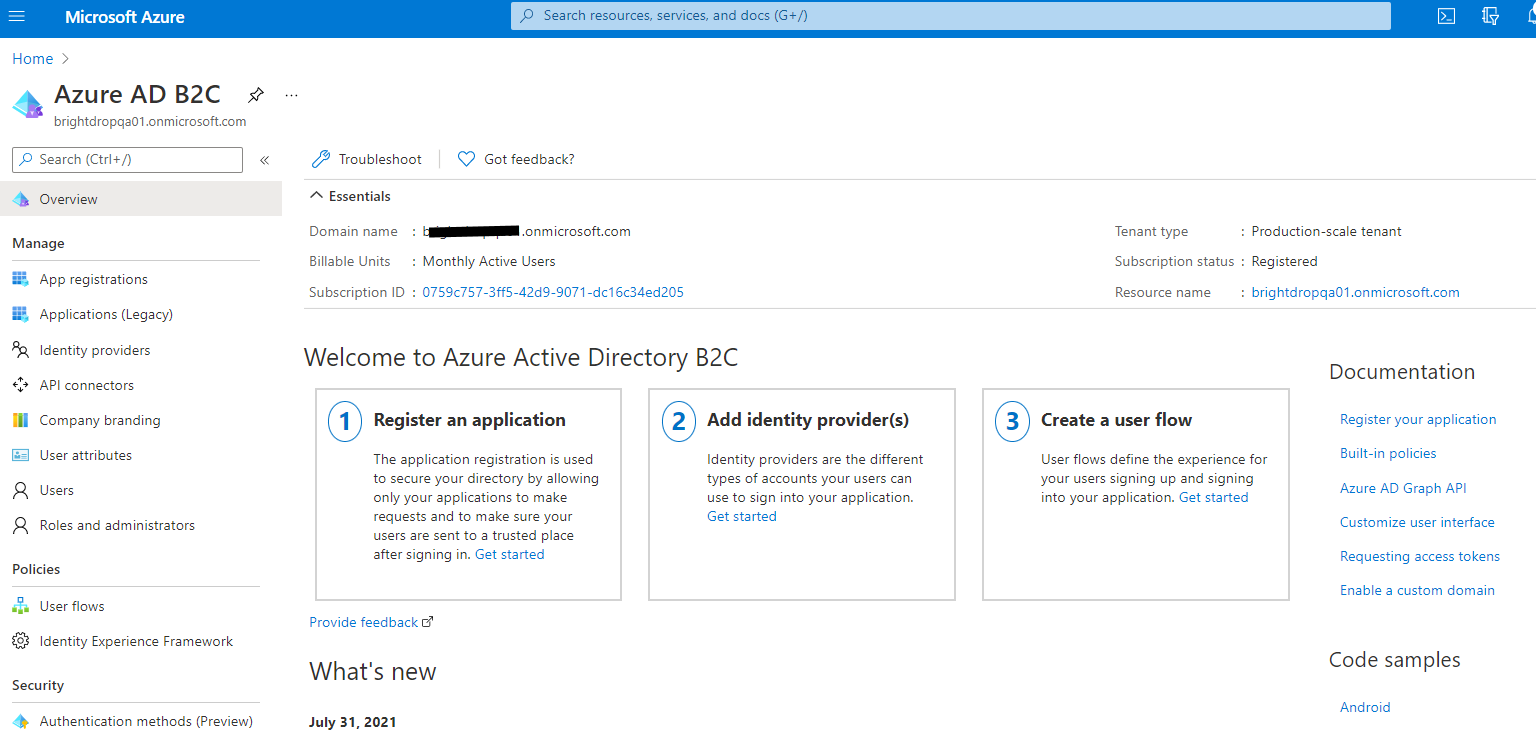 Fig. 2
Select the “User flows” icon (Fig. 2) in the left menu to display the “User flows” blade. Existing user flows are shown, as in Fig. 4.
 Fig. 3
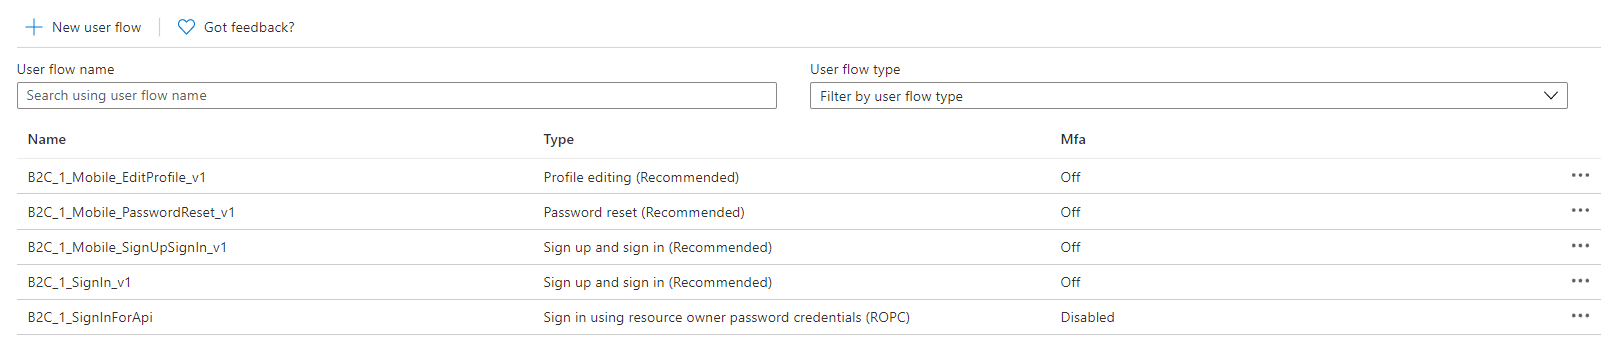 Fig. 4
Click the [+ New user flow] button (Fig. 5) to display the “Create a user flow” dialog, as shown in Fig. 6.
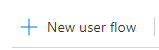 Fig. 5
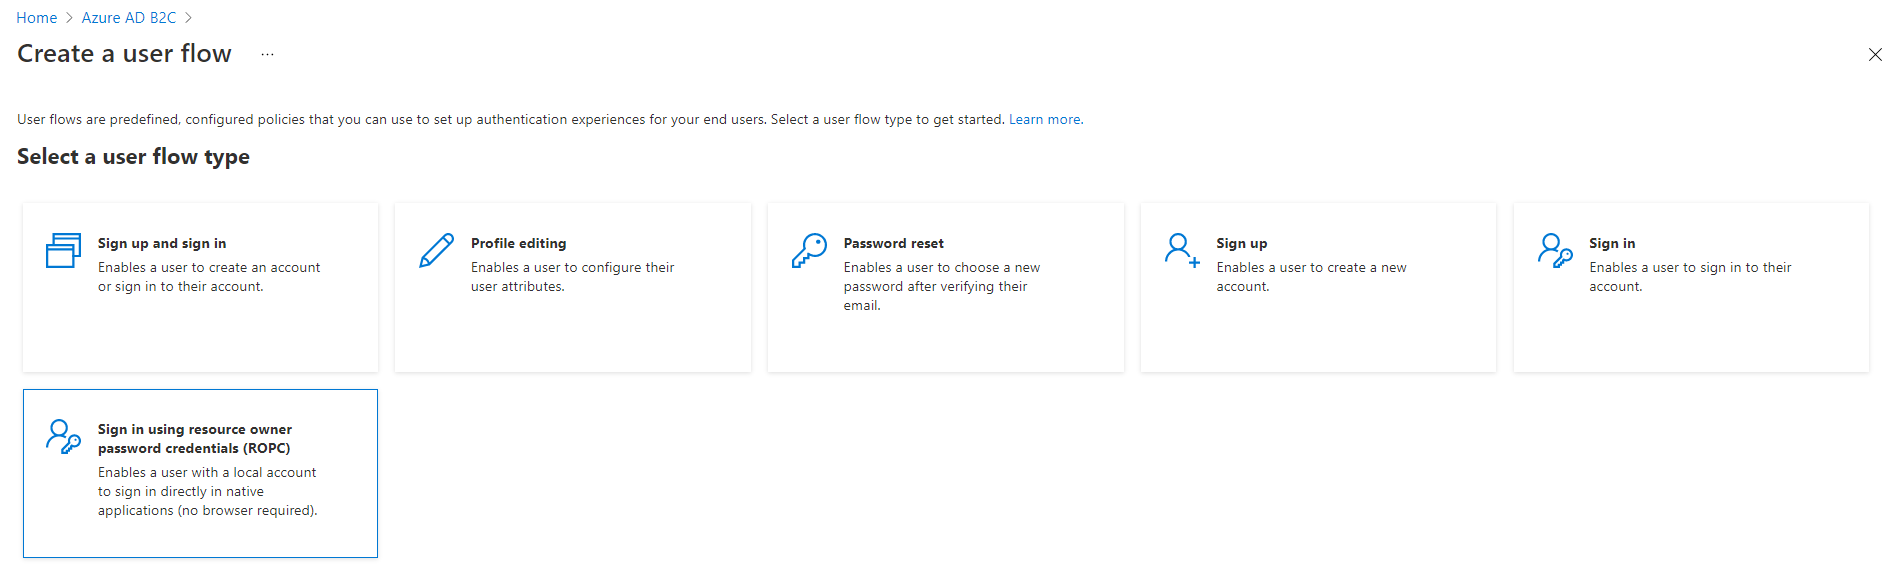 Fig. 6
Several flow types are shown. Click the “ROPC” option (Fig. 7) to display the “Create” dialog, as shown in Fig. 7.
 Fig. 7
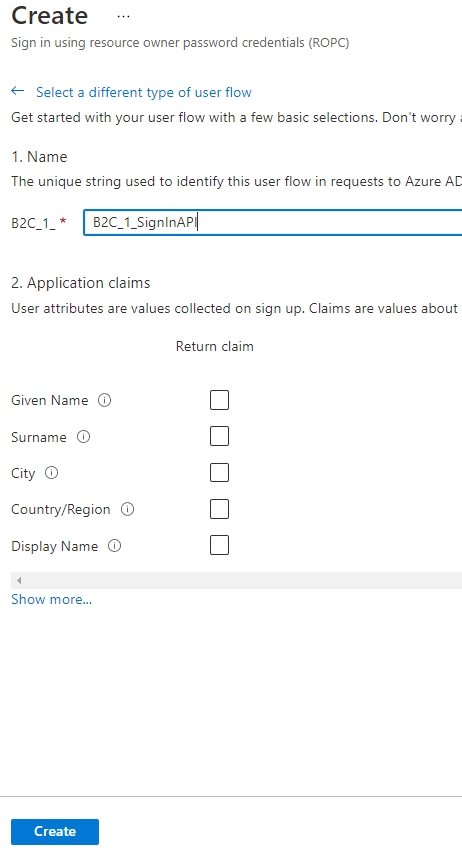 Fig. 8
At the “B2C_1_*” prompt, enter a unique name for the user flow you will create. The name will be “B2C_1_”, followed by whatever you enter in this field.
Click the “show more…” link to display a list of available application claims, as shown in Fig. 9.
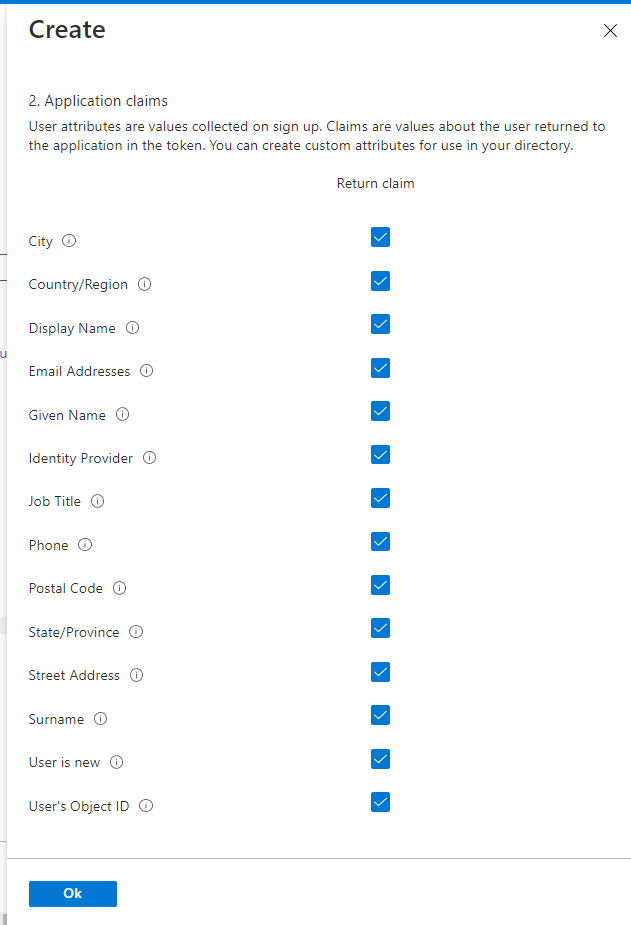 Fig. 9
A claim is information that the authentication provider returns when it authenticates a user. Check the checkbox next to each claim.
NOTE: For our partner’s project, the email address was an important piece of information, because it was used to look up a user and determine to which roles they belong. This was used to determine if the user was authorized to call a given API.
Click the [Ok] button to close this dialog and return to the previous blade, as shown in Fig. 10.
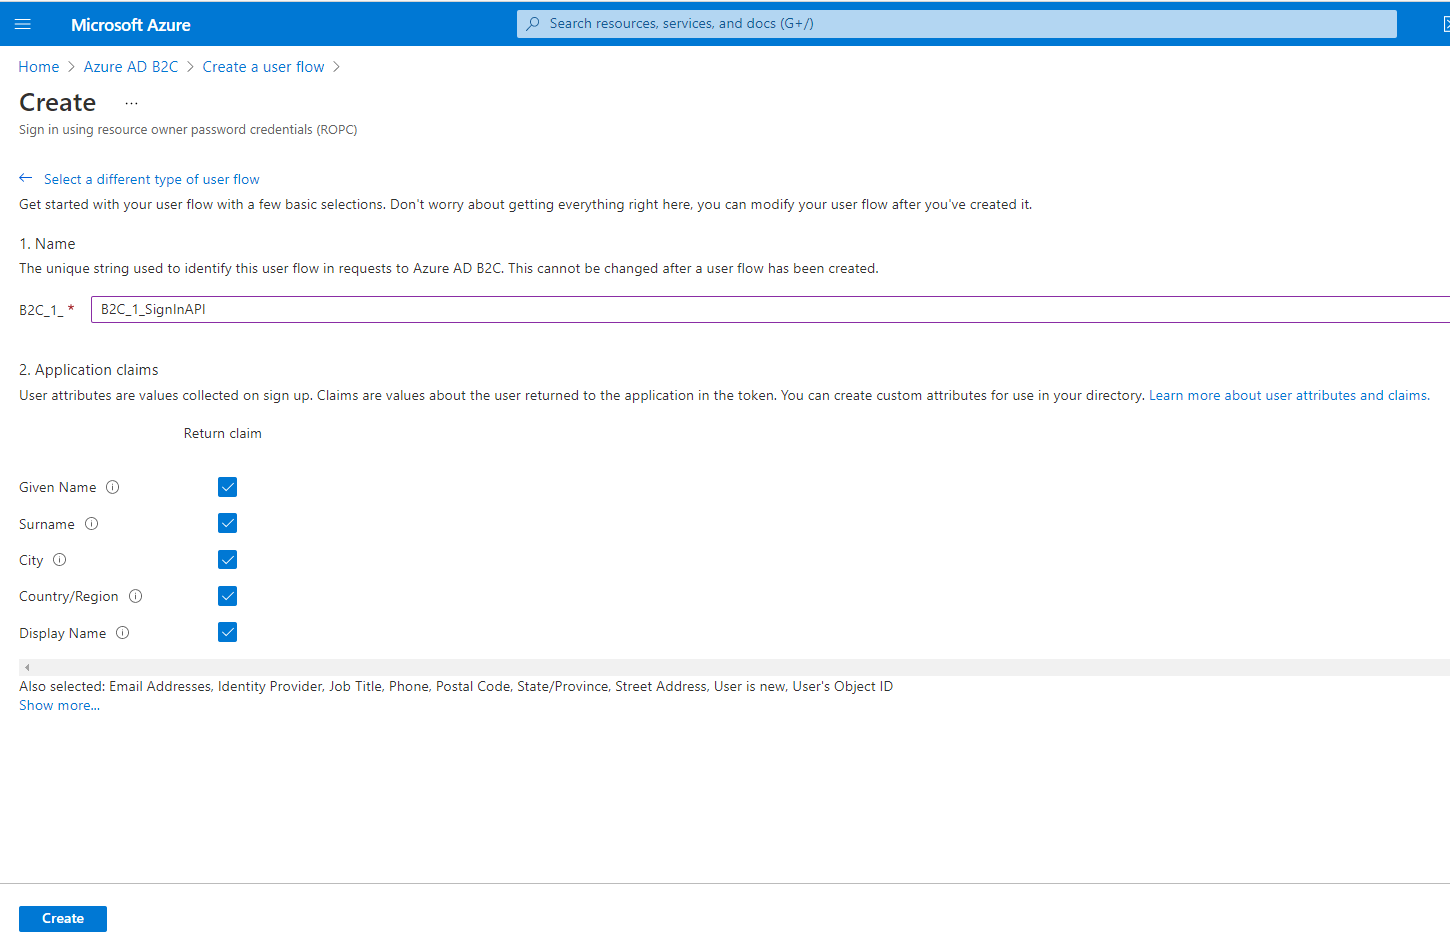 Fig. 10
Click the [Create] button to save the User Flow and return to the “User Flows” blade, as shown in Fig. 11.
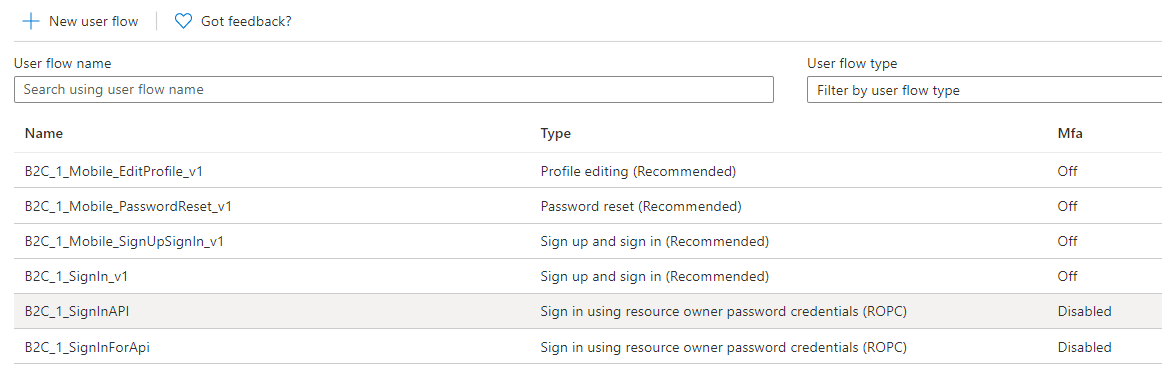 Fig. 11
Notice that the flow you created is now in the list of User Flows.
You have now created a new user flow that can be used to authenticate users.
Create user
We need to create a test user under which to run automated tests.
At the Azure AD B2C page, click the “Users” icon (Fig. 12) on the left menu to open the Users blade, as shown in Fig. 13.
![]() Fig. 12
Fig. 12
 Fig. 13
Click the [New user] button (Fig. 14) to open the “New user” dialog, as shown in Fig. 15.
![]() Fig. 14
Fig. 14
 Fig. 15
Select the “Create Azure AD B2C user” radio button.
At the “Sign in method” dropdown, select “User Name” and provide a name for this user in the text box next to the dropdown.
At the “Name” field, enter a name for this user. The name must be unique within this B2C tenant.
Select the “Let me create the password” radio button and enter a password for this user. Remember this password!
Enter a First name and Last name for this user.
Click the [Create] button to create the user and return to the “Users” blade. You can use the filter textbox to search for the user you added, as shown in Fig. 16.
![]() Fig. 16
Fig. 16
Register an Application
You will need to register an application in order to authenticate. Select “App registrations” from the left menu of the tenant page to display the “App registrations” blade, as shown in Fig. 17.
 Fig. 17
Click the [New registration] button (Fig. 18) to display the “Register an application” blades, as shown in Fig. 19.
![]() Fig. 18
Fig. 18
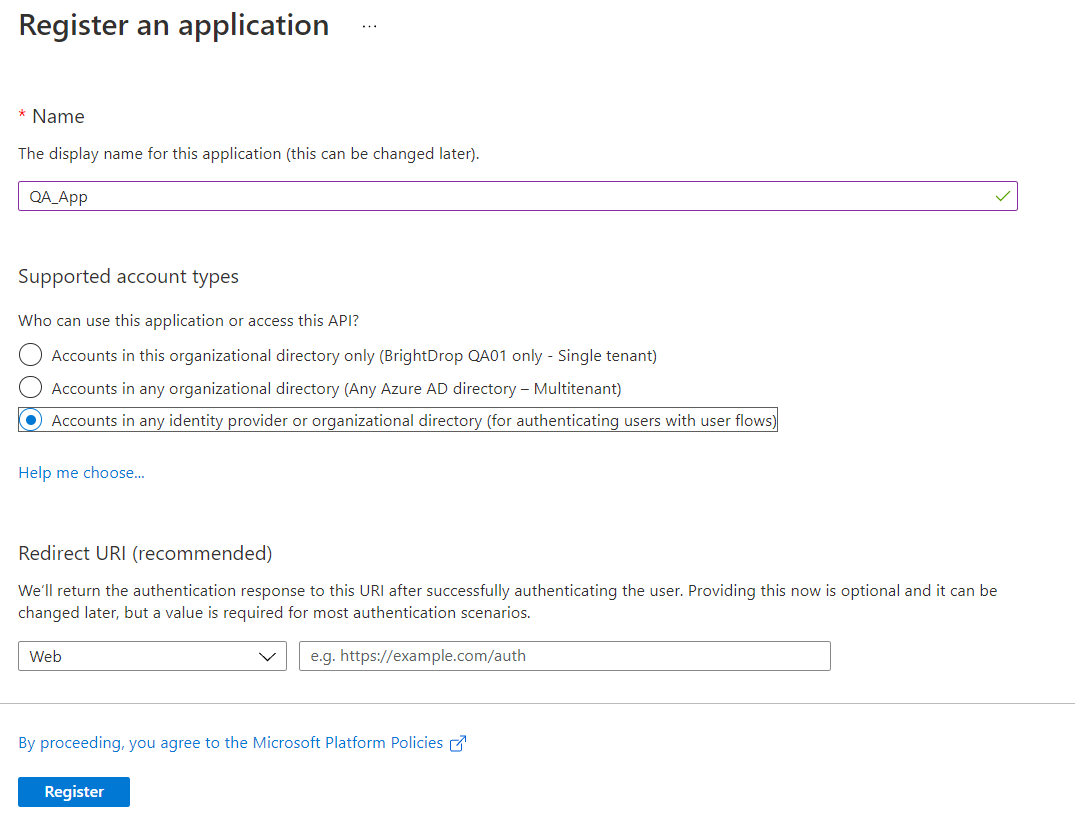 Fig. 19
At the “Name” field, enter a name that is unique within this tenant.
At the “Supported account types” field, select the “Accounts in any identity provider or organization directory” radio button.
Leave blank the “Redirect URI”
Click the [Register] button to register this application.
The “App Registration Info” blade displays, as shown in Fig. 20.
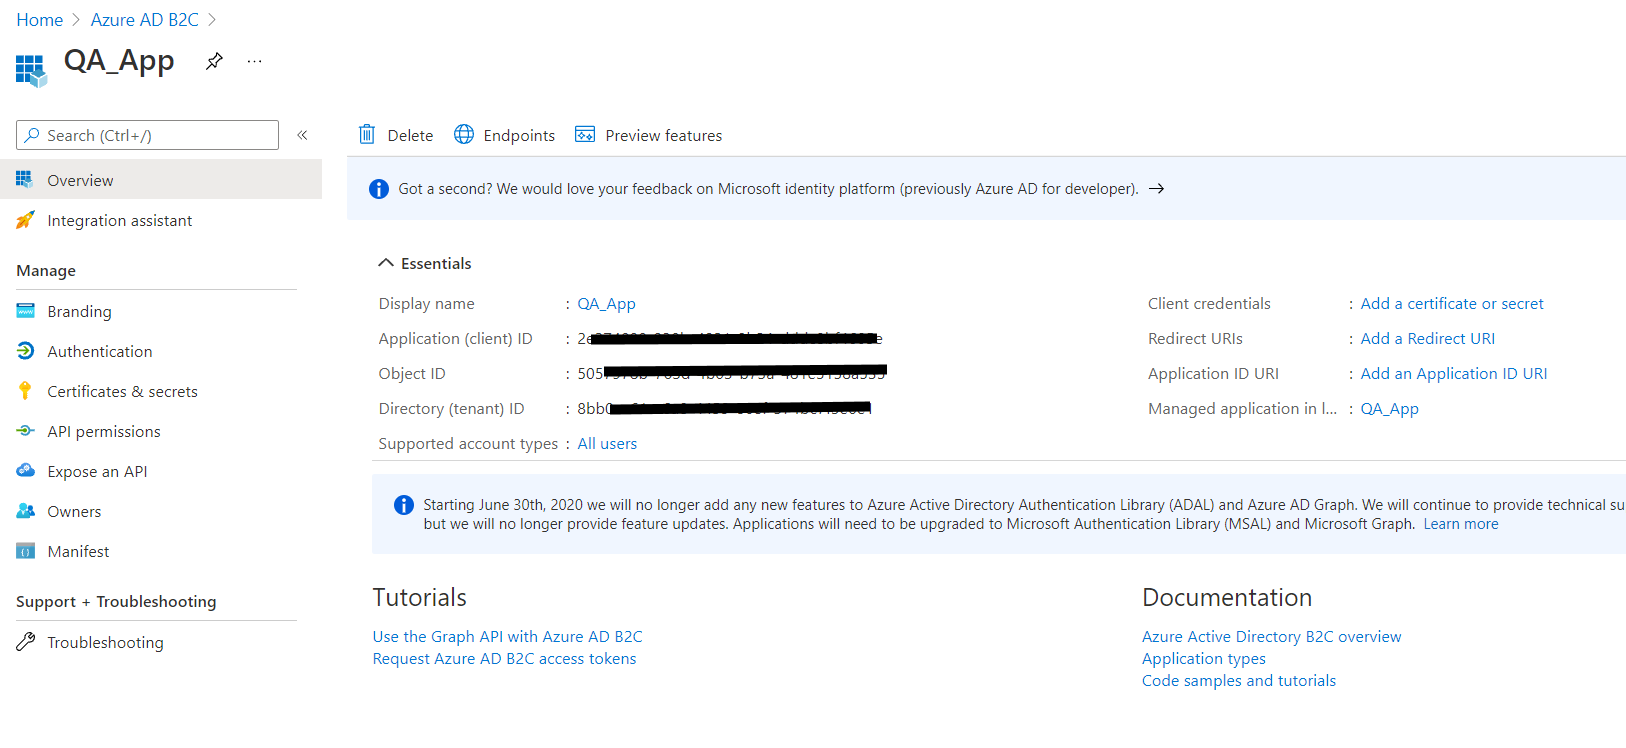 Fig. 20
Make note of the Application (client) ID.
Click [Authentication] from the Application Registration left menu to display the “Authentication” blade, as shown in Fig. 21.
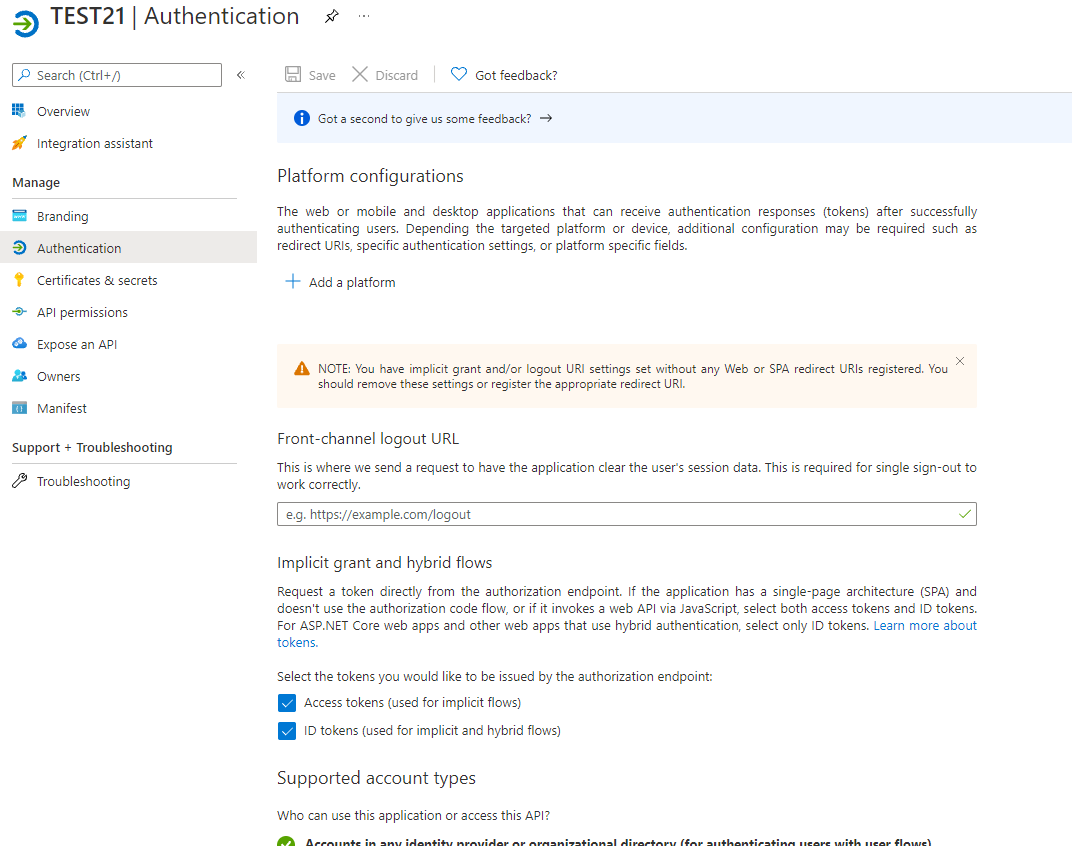 Fig. 21
Check the “Access tokens (used for implicit flows)” and “ID tokens (used for implicit and hybrid flows)” checkboxes.
Click the [Save] button to save this change.
The final piece of information we need from the Application Registration is the Token Endpoint. To get this, select the “Endpoints” tab on the “Overview” blade, as shown in Fig. 22.
 Fig. 22
A list of endpoints for this application registration displays, as shown in Fig. 23.
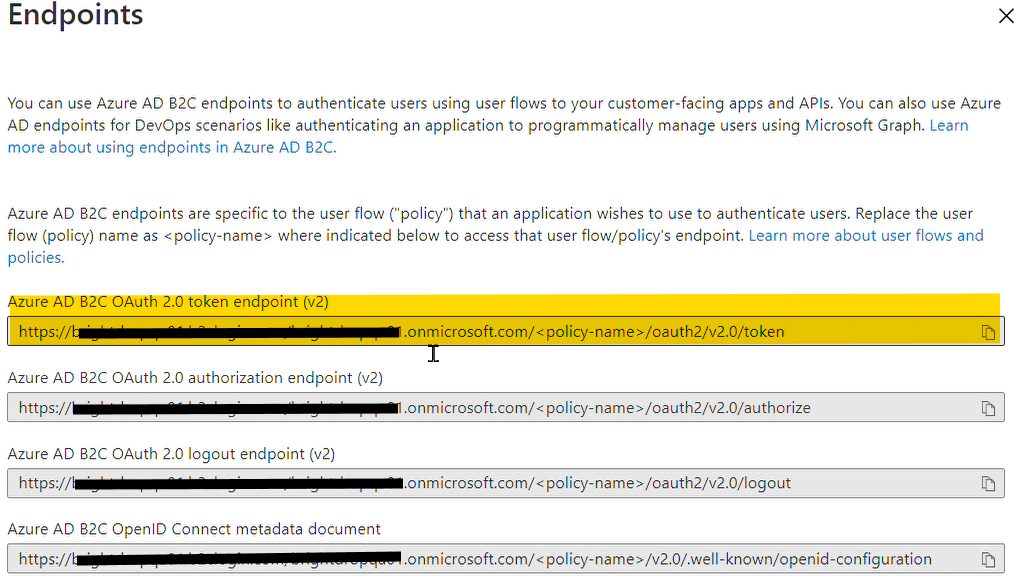 Fig. 23
Copy and save the value under “Azure AD B2C OAuth 2.0 token endpoint (v2). Notice that the word “policy-name” is enclosed in brackets. This is a placeholder. Replace this text (including the brackets) with the name of the flow you created above. This is your Token Endpoint – the URI to which you will send an HTTP POST request in order to retrieve a token.
Retrieve token via HTTP POST
You can now retrieve the token with an HTTP POST request.
You determined the URI in the step above. It is the Token Endpoint.
The body of the HTTP POST request is:
username=uuuuuuuu&password=pppppppppp&grant_type=password&scope=openid+cccccccc-cccc-cccc-cccc-cccccccccccc+offline_access&client_id=cccccccc-cccc-cccc-cccc-cccccccccccc&response_type=token+id_token
where:
- uuuuuuuu is the name of the test user you created
- pppppppppp is the password for this user
- cccccccc-cccc-cccc-cccc-cccccccccccc is the Application (client ID) , as recorded above.
For example, for a hypothetical user named “testuser1” with a password of “Password123” in Azure Tenant a6c82581-9cc8-43c7-858d-4157fe85de9c, the body will be:
username=testuser1&password=Password123!&grant_type=password&scope=openid+a6c82581-9cc8-43c7-858d-4157fe85de9c+offline_access&client_id=a6c82581-9cc8-43c7-858d-4157fe85de9c&response_type=token+id_token
If successful, the POST will return JSON in the request with the following properties:
- access_token
- token_type
- expires_in
- refresh_token
- id_token
The access_token property is the one you will need to add the Authentication header of REST API calls.
You can decode this token at https://jwt.ms .
YARC Chrome Extension
Fig. 24 shows an example of this call using the YARC Chrome extension
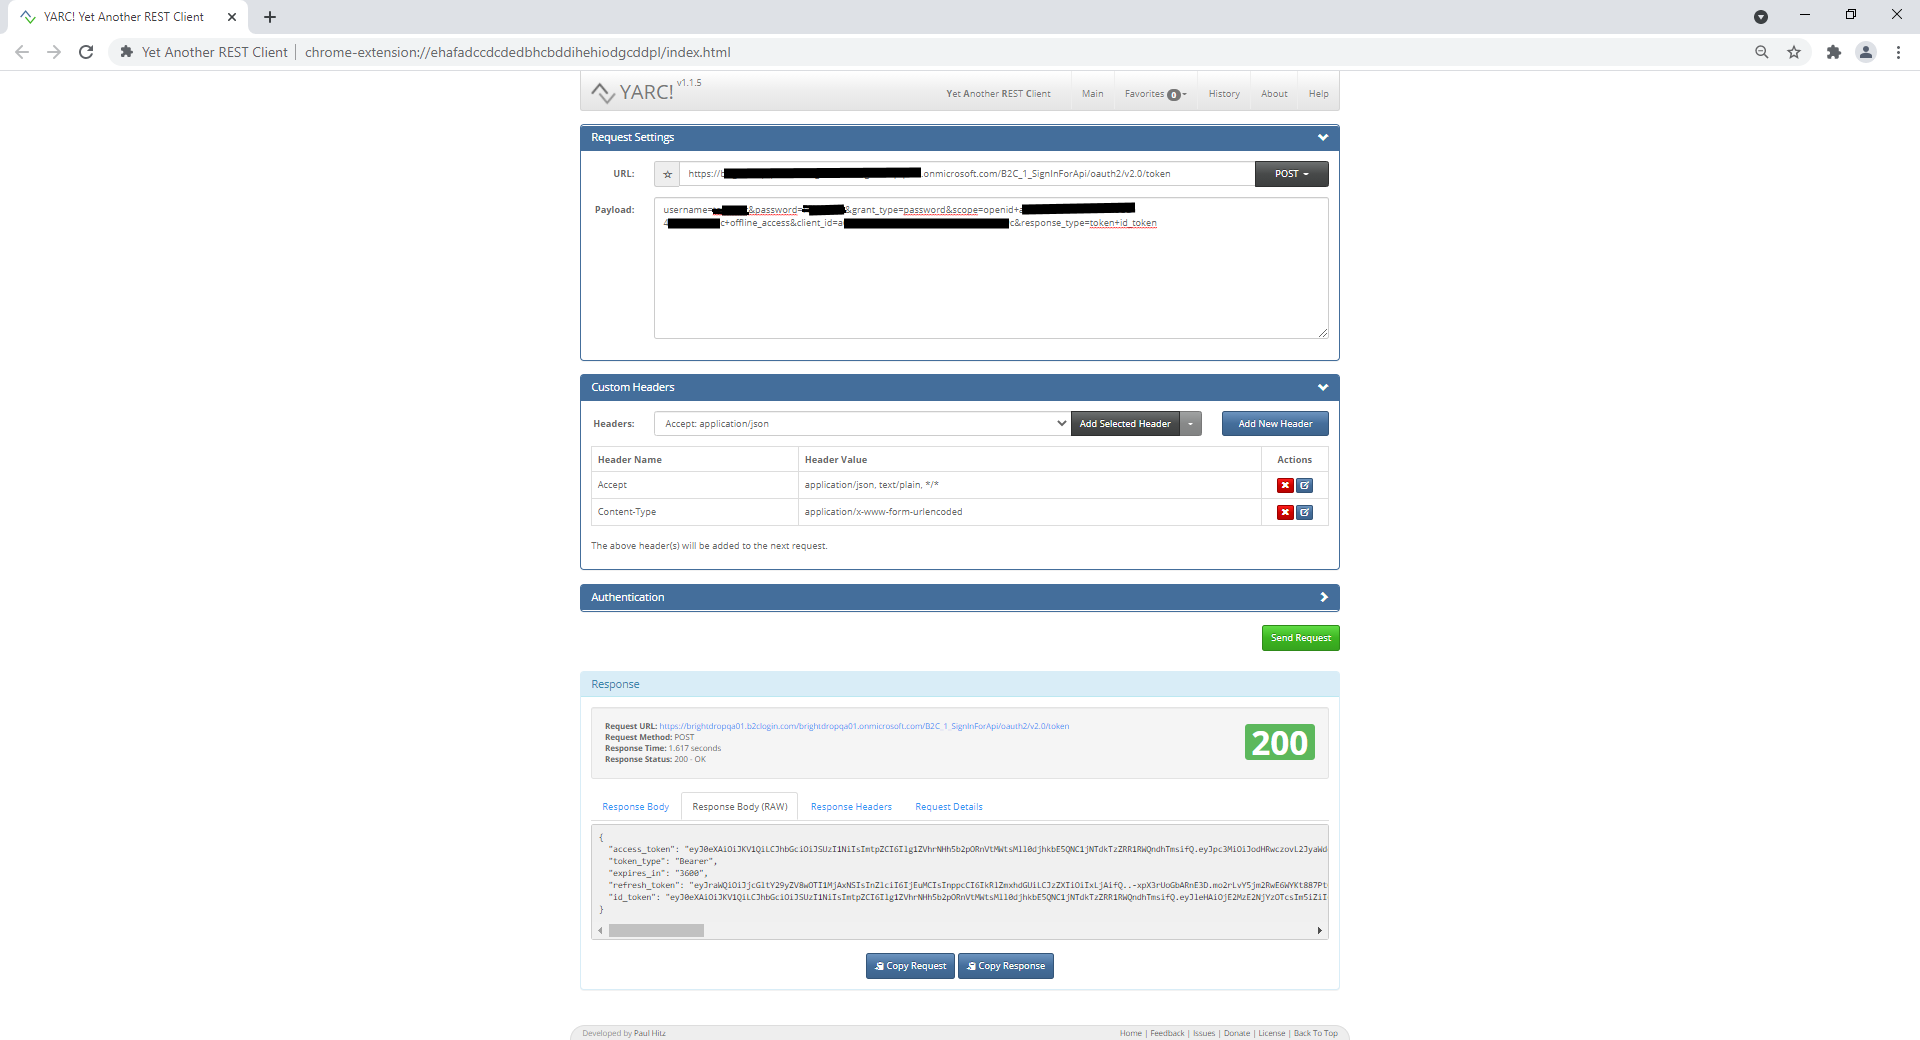 Fig. 24
Java
Here is Java code that uses the Spring WebClient class to retrieve the token:
  public static String getAuthToken(
        String b2cFlowUri
        String username,
        String password,
        String tenantId) {
    String scope = String.format("openid+%s+offline_access", tenantId);
    String payload = String.format("username=%s&password=%s&grant_type=password&scope=openid+%s+offline_access&client_id=%s&response_type=token+id_token", username, password, tenantId, tenantId);

    WebClient webClient = WebClient.create();
    var postAuthResponseEntity = webClient.post()
            .uri(b2cFlowUri)
            .contentType(MediaType.APPLICATION_FORM_URLENCODED)
            .bodyValue(payload)
            .retrieve()
            .bodyToMono(B2CTokenResponse.class)
            .block();

    String accessToken = postAuthResponseEntity.getAccess_token();
    return accessToken;
  }
curl
Here is a curl command executing this HTTP POST request. You will need to modify it to match your data and settings. =
curl -d "username=uuuuuuuu&password=pppppppppp&grant_type=password&scope=openid+cccccccc-cccc-cccc-cccc-cccccccccccc+offline_access&client_id=cccccccc-cccc-cccc-cccc-cccccccccccc&response_type=token+id_token" uuuuuuuuuuuuuu
where:
- uuuuuuuu is the name of the test user you created
- pppppppppp is the password for this user
- cccccccc-cccc-cccc-cccc-cccccccccccc is the Application (client ID), as recorded above.
- uuuuuuuuuuuuuu is the Token Endpoint.
For example, for a hypothetical user named “testuser1” with a password of “Password123” in Azure Tenant a6c82581-9cc8-43c7-858d-4157fe85de9c and a Token Endpoint of ‘https://mytenant.b2clogin.com/mytenant.onmicrosoft.com/BRC_1_API_SignIn/oauth2/v2.0/token ‘, the curl command will be:
username=testuser1&password=Password123!&grant_type=password&scope=openid+a6c82581-9cc8-43c7-858d-4157fe85de9c+offline_access&client_id=a6c82581-9cc8-43c7-858d-4157fe85de9c&response_type=token+id_token https://mytenant.b2clogin.com/mytenant.onmicrosoft.com/BRC_1_API_SignIn/oauth2/v2.0/token
Things to Consider
For application-to-application calls, an Access Token is usually more appropriate than an ID Token. An Access Token provides access to a specific resource, such as a REST API and does not authenticate a specific user, as an ID Token does. However, in this case, the partner implemented the security using ID Tokens. This required us to create a test user and to force the API to validate that the user had permission to make the call.
The new User Flow we create may be similar to the Flow designed to be used by the application in production, but it is not identical. If you are running tests, consider wether the difference is significant enough to question the validity of the tests.
Because our new User Flow bypasses user interaction, it may be less secure than a Flow that requires more from the user – Two-Factor Authentication, for example. Consider the security implications before deploying a new User Flow.
Passwords and other sensitive information should be stored in a secure place, such as in Azure Key Vault.
Videos
I created a video demonstrating the steps above. You can find it here .
If you need to create an Azure Active Directory B2C tenant, the following videos will help:
Conclusion
Using the above steps, we were able to automate the retrieval of a JSON Web Token without any user intervention and use this to pass in the headers of an HTTP Request to a secured web service.
Below are some links to official Microsoft documentation that will help in understanding the process and concepts described above:
- Tutorial: Create user flows and custom policies in Azure Active Directory B2C
- Set up a resource owner password credentials flow in Azure Active Directory B2C
 Light
Light Dark
Dark