
VC MSBuild Extensibility Example
Hello, my name is Felix Huang and I am a developer on the Visual C++ team. Over the last year, I worked on making the build system in Visual Studio 2010 more flexible with MSBuild system as the foundation. For those who felt the need to use batch scripts to power your builds, I hope that this new system would provide you with that much flexibility while maintaining a similar UI feeling as the previous version of Visual Studio. Previous article written by Marian Luparu touches more on the benefits of MSBuild. In this post, I will provide an example augmenting the build system and property page to better suit development life cycle.
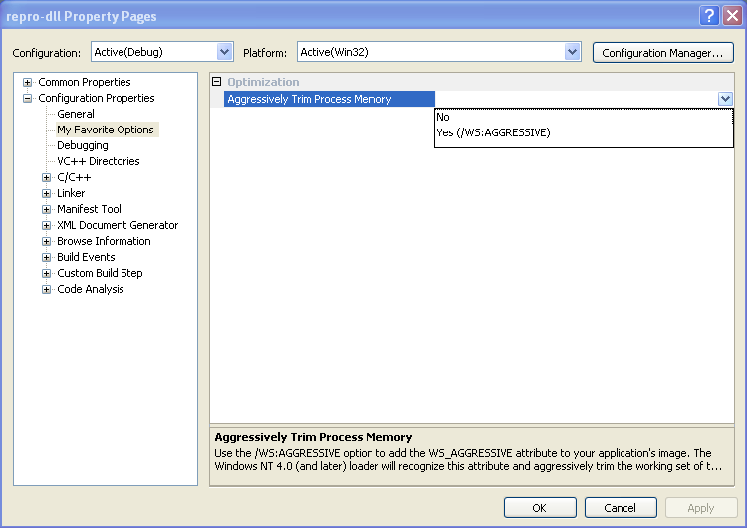
Suppose you want to add another switch to an existing tool. Let’s take /WS:AGGRESSIVE found in link.exe as an example. We create a file called myfavorite.xml next to a project. This file describes the structure of the UI property page. We want to use a Boolean switch inside the Optimization category. By copying and pasting comments from MSDN, we get the snippet below.
<?xml version=”1.0″ encoding=”utf-8″?>
<ProjectSchemaDefinitions xmlns=”clr-namespace:Microsoft.Build.Framework.XamlTypes;assembly=Microsoft.Build.Framework” xmlns:x=”http://schemas.microsoft.com/winfx/2006/xaml” xmlns:sys=”clr-namespace:System;assembly=mscorlib”>
<Rule Name=”MyFavoriteOptions” PageTemplate=”generic”>
<Rule.DisplayName>
<sys:String>My Favorite Options</sys:String>
</Rule.DisplayName>
<Rule.Categories>
<Category Name=”Optimization”>
<Category.DisplayName>
<sys:String>Optimization</sys:String>
</Category.DisplayName>
</Category>
</Rule.Categories>
<Rule.DataSource>
<DataSource Persistence=”ProjectFile” ItemType=””/>
</Rule.DataSource>
<BoolProperty Switch=”WS:AGGRESSIVE” Name=”WSAggressive” Category=”Optimization”>
<BoolProperty.DisplayName>
<sys:String>Aggressively Trim Process Memory</sys:String>
</BoolProperty.DisplayName>
<BoolProperty.Description>
<sys:String>Use the /WS:AGGRESSIVE option to add the WS_AGGRESSIVE attribute to your application’s image. The Windows NT 4.0 (and later) loader will recognize this attribute and aggressively trim the working set of the process when it is not active.<sys:String>
</BoolProperty.Description>
</BoolProperty>
</Rule>
</ProjectSchemaDefinitions>
Refer to Li Shao’s blog on the topic for writing xml. Restart Visual Studio to load the changes.
Next, we will attach the switch to the target file, thus passing it to the linker during execution. There are many ways to do this; but let’s use a new feature in MSBuild 4.0 called Before/After targets. Inside one of your project file (.vcxproj), add the <Target> below to the <Project> scope. By using the BeforeTargets, it will insert this target into the execution of the build before the link target gets run. Thus, we are able to modify the value in the Additional Options appending our switch to the end.
<ItemGroup>
<PropertyPageSchema
Include=”$(MSBuildThisFileDirectory)\myfavorite.xml” />
</ItemGroup>
<Target Name=”WSAggressiveTarget” BeforeTargets=”Link”>
<ItemGroup>
<Link>
<AdditionalOptions Condition=”‘$(WSAggressive)’==’true'”>%(Link.AdditionOptions) /WS:Aggressive</AdditionalOptions>
</Link>
</ItemGroup>
</Target>
The PropertyPageSchema ItemGroup will let the IDE to know where to look for the xml. Now your project is ready for building.
Thanks for reading.
Felix Huang
 Light
Light Dark
Dark
0 comments