
An In Depth Tutorial on Linux Development on Windows with WSL and Visual Studio Code
In an earlier blog post, Take your Linux development experience in Windows to the next level with the Windows Subsystem for Linux (WSL) and Visual Studio Code Remote, we introduced an overview of the VS Code Remote – WSL extension, which simplifies Linux development on Windows Subsystem on Linux (WSL). Put on your SCUBA gear, because in this follow up we’ll give you a deep dive tutorial on how to setup WSL and VS Code for Python development by creating a Python “Hello World” application.
Windows: A great platform for building Linux Apps
Windows is the most popular operating system in the world, with almost 50% of developers using it every day. At the same time, many of these developers are building applications that are deployed to Linux-based servers running in the cloud or on-premises.
With WSL and VS Code, you can now seamlessly develop Linux-based applications on Windows. WSL lets you run a full Linux distro on Windows, where you can install platform-specific toolchains, utilities, and runtimes.
VS Code and the WSL extension let you develop in the context of the Linux environment, using those tools and runtimes, from the comfort of Windows. All of your VS Code settings are maintained across Windows and Linux, making it easy to switch back and forth. Commands and workspace extensions are run directly in Linux, so you don’t have to worry about pathing issues, binary compatibility, or other cross-OS challenges. You’re able to use VS Code in WSL just as you would from Windows. One tool, two operating systems.
If it sounds magical, that’s because it is! But, don’t take our word for it. Let’s get our hands dirty and build a simple Python3 application so you can experience the magic for yourself.
Install and set up WSL
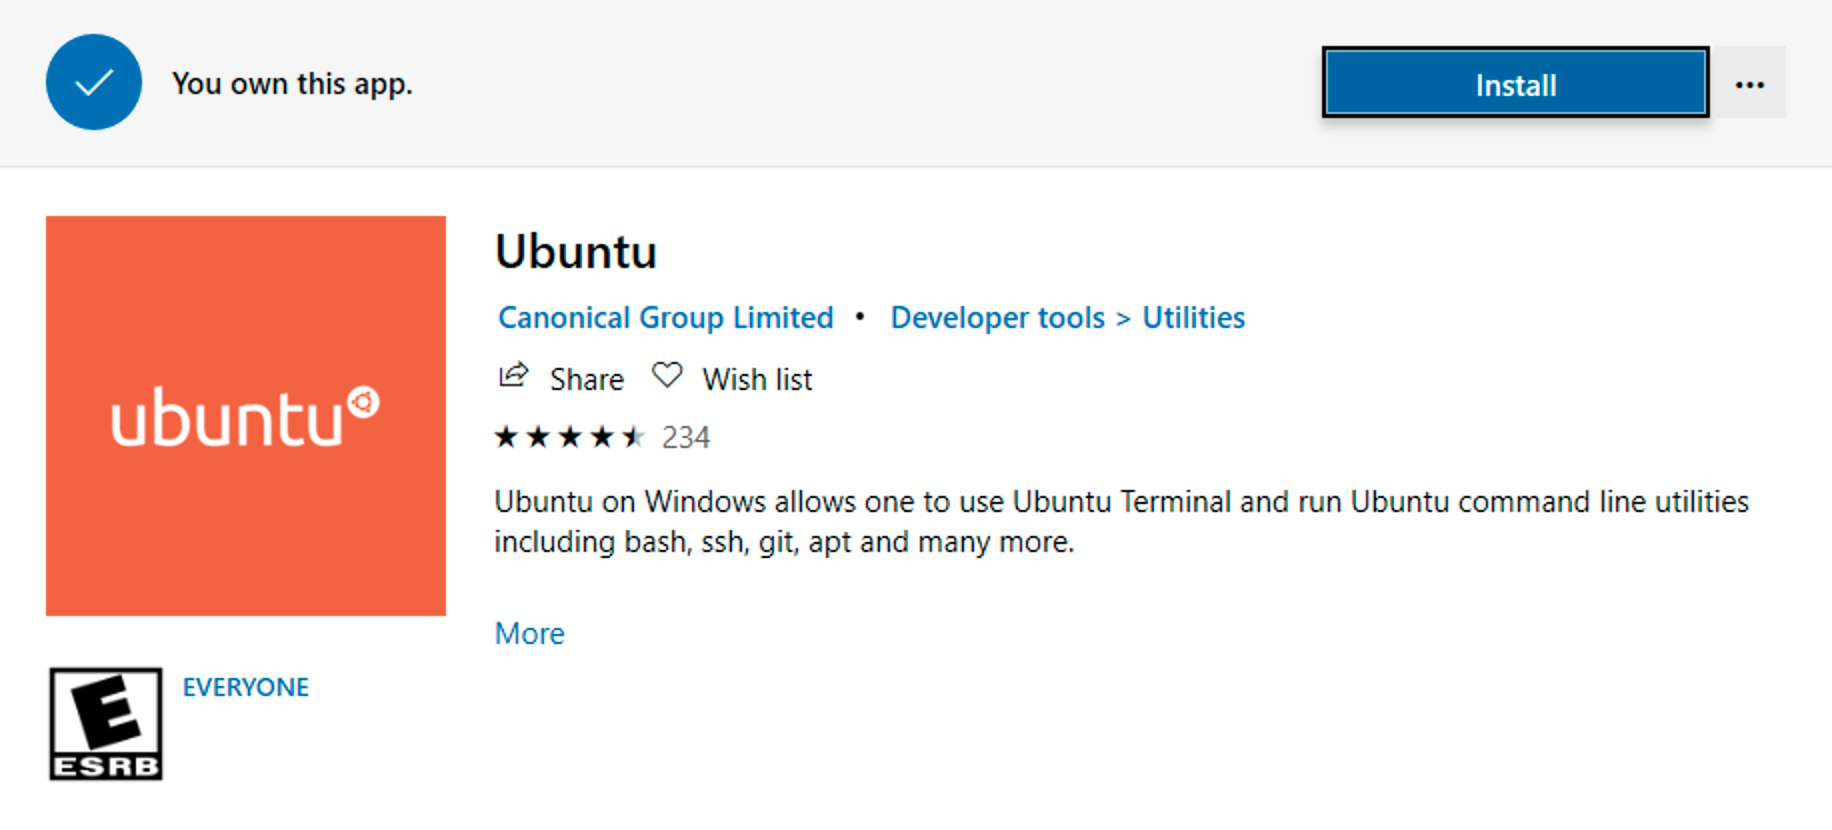
You install WSL from the Microsoft Store. You can search for “Linux” in the Microsoft store to see a sub section of distributions in the store. Choose the Linux distribution you want to install and follow the prompts. You can also search for distributions in the search bar.
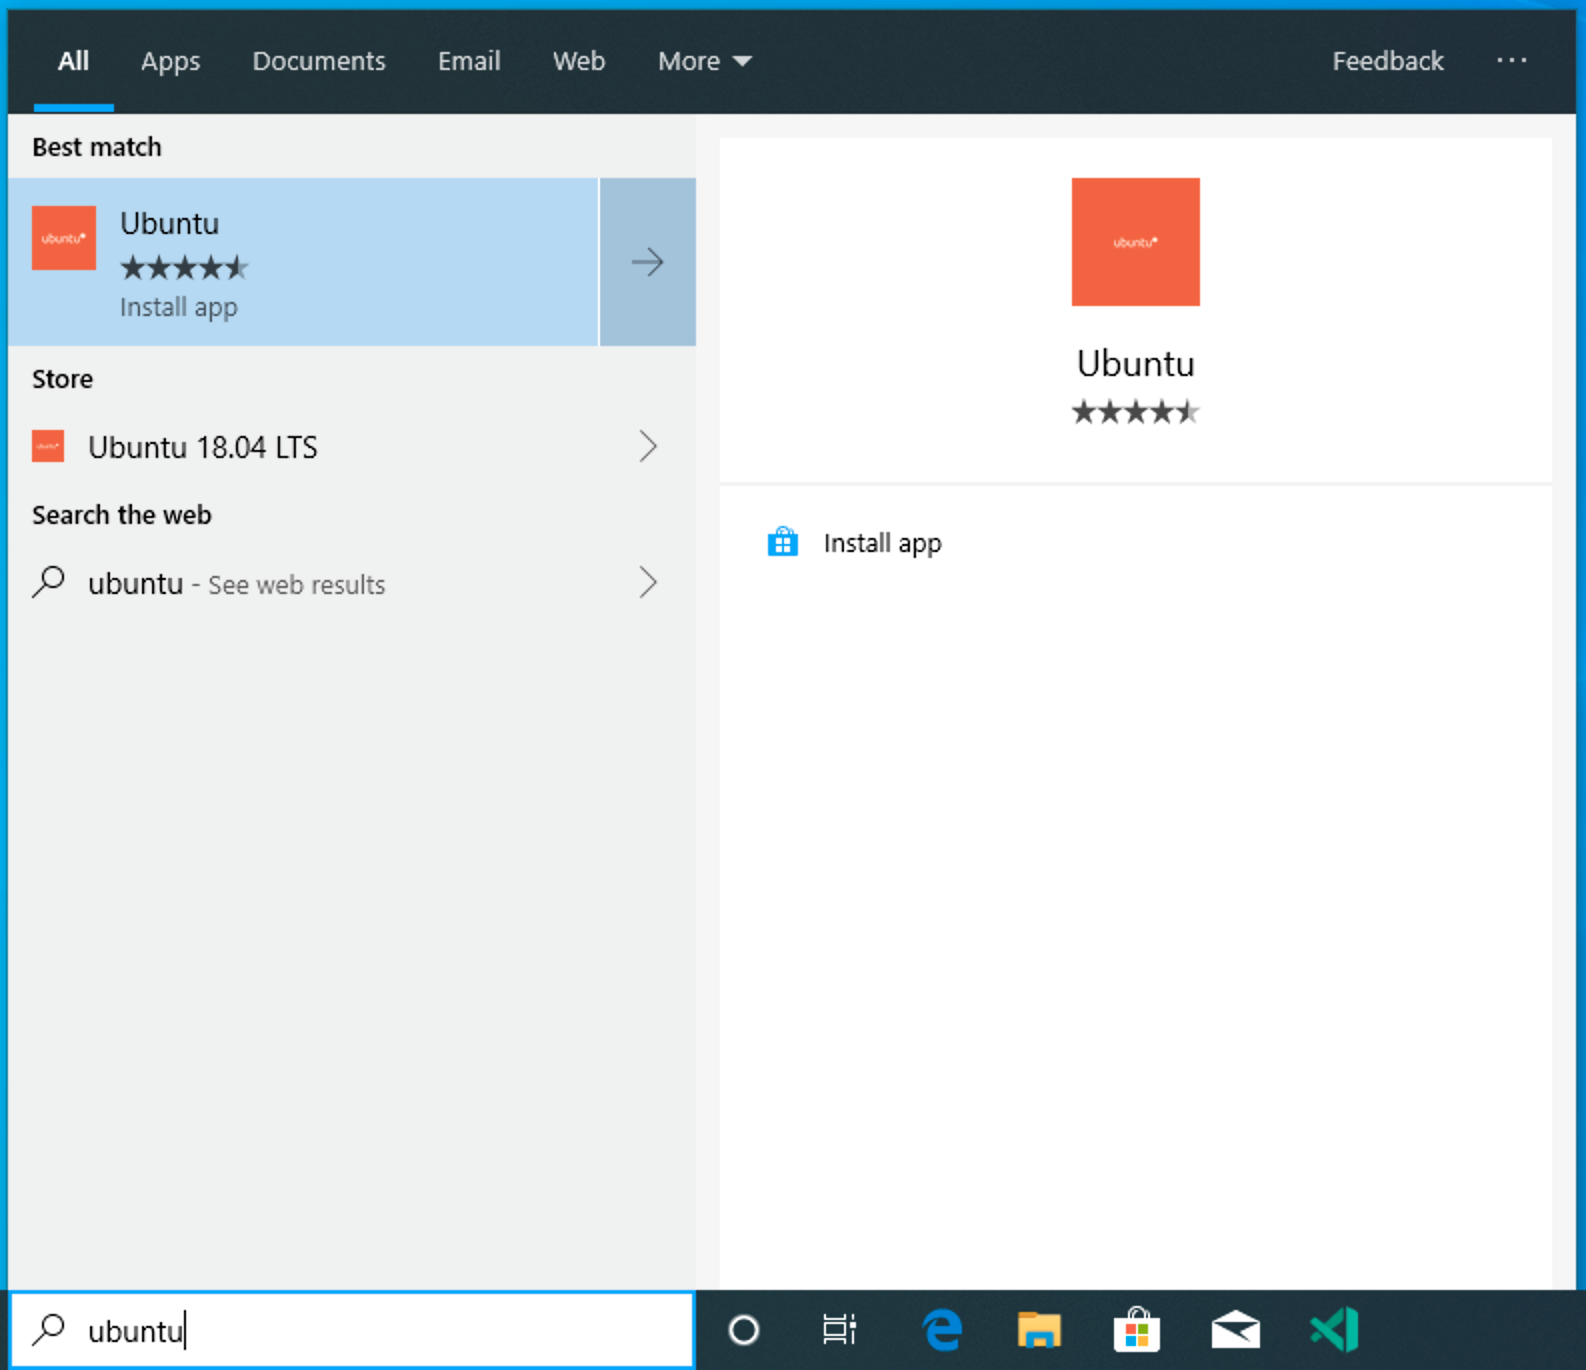
Select Install.
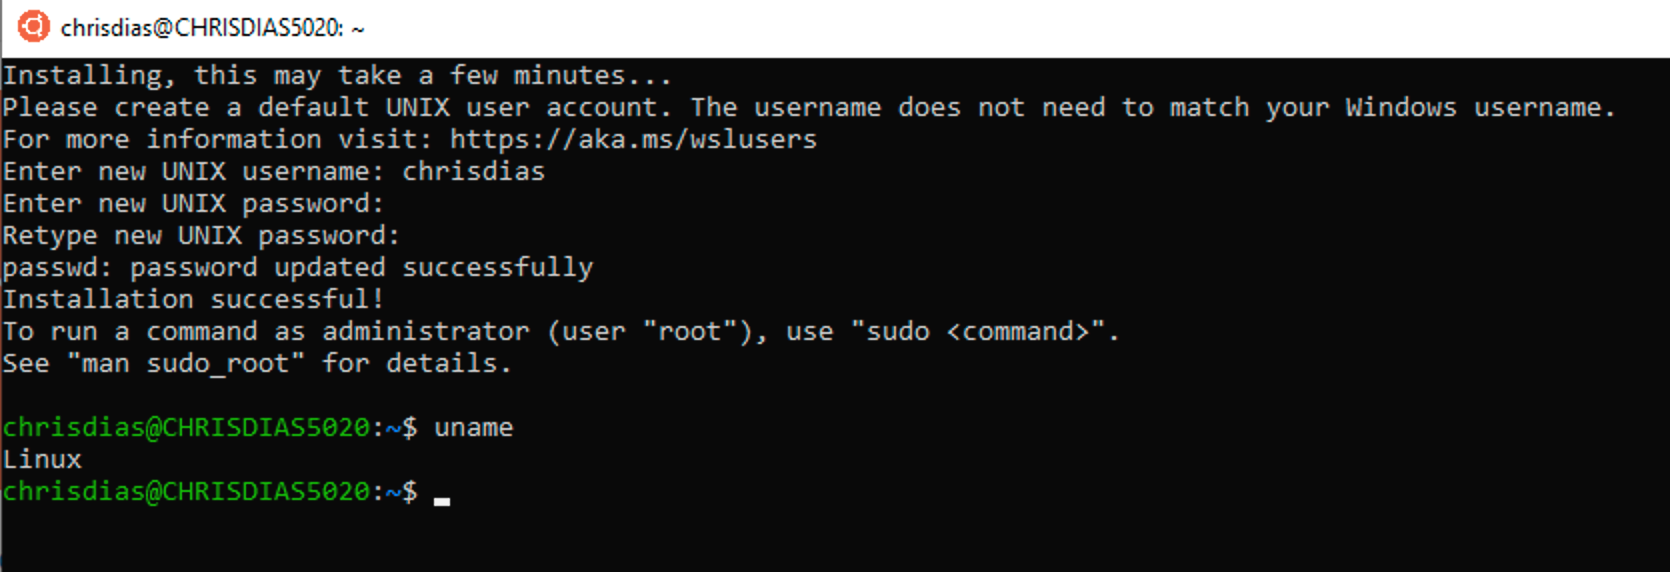
And when done, select Launch to get started. This will open a Linux terminal and complete the installation. You’ll need to create a user ID and password since we’re setting up a full Linux instance, but once that’s done, boom! You are running Linux on Windows.
Python development
If you don’t have Python already installed, run the following commands to install Python3 and pip, the package manager for Python, into your Linux installation.
sudo apt update
sudo apt install python3 python3-pip
And to verify, run:
python3 –versionThis isn’t intended to be a Python tutorial, so we’ll do the canonical “Hello World” app. Create a new folder called “helloWorld” and then add a Python file that will print a message when run:
mkdir helloWorld && cd helloWorld
echo 'print("hello from python running in Linux on windows!")' >> hello.py
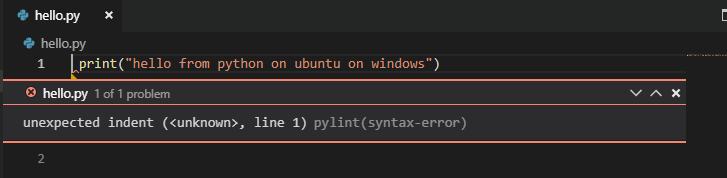
python3 hello.pyClearly, echo isn’t a great way to do development. In a remote Linux environment (this WSL distro is technically another machine without UI, that just happens to be running locally on your computer), your development tools and experiences are pretty limited. You can run Vim in the terminal to edit your file or you can edit the sources on the Windows side through the \\wsl$ mount:
The problem with this model is that the Python runtime, pip, or any conda packages for that matter, are not installed on Windows.
Remember, Python is installed in the Linux distro, which means if we’re editing Python files on the Windows side, we can’t run or debug them unless we install the same Python development stack on Windows. And that defeats the purpose of having an isolated Linux instance set up with all our Python tools and runtimes!
What can we do? That’s where Visual Studio Code and the Remote – WSL extension comes to the rescue.
Visual Studio Code
VS Code is a lightweight, cross platform source code editor, built on open source. It comes with built-in support for modern web development with JavaScript, TypeScript, Node.js, CSS, etc. It also has a rich ecosystem of extensions (10K+) providing support for 100s of languages and frameworks, such as Python, Go, PHP, Java, C++, and C#.
If you don’t already have VS Code, download it now. It’s about 50 MB to download on Windows and sets up in less than a minute.
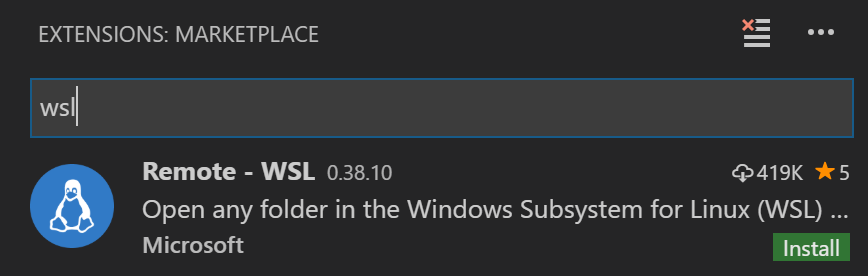
Now we just need the magic, and that is the Remote – WSL extension. Open the Extensions view in VS Code (Ctrl+Shift+X) and search for “wsl”. Choose the Remote – WSL extension as seen below (it should be at the top of the list) and press Install.
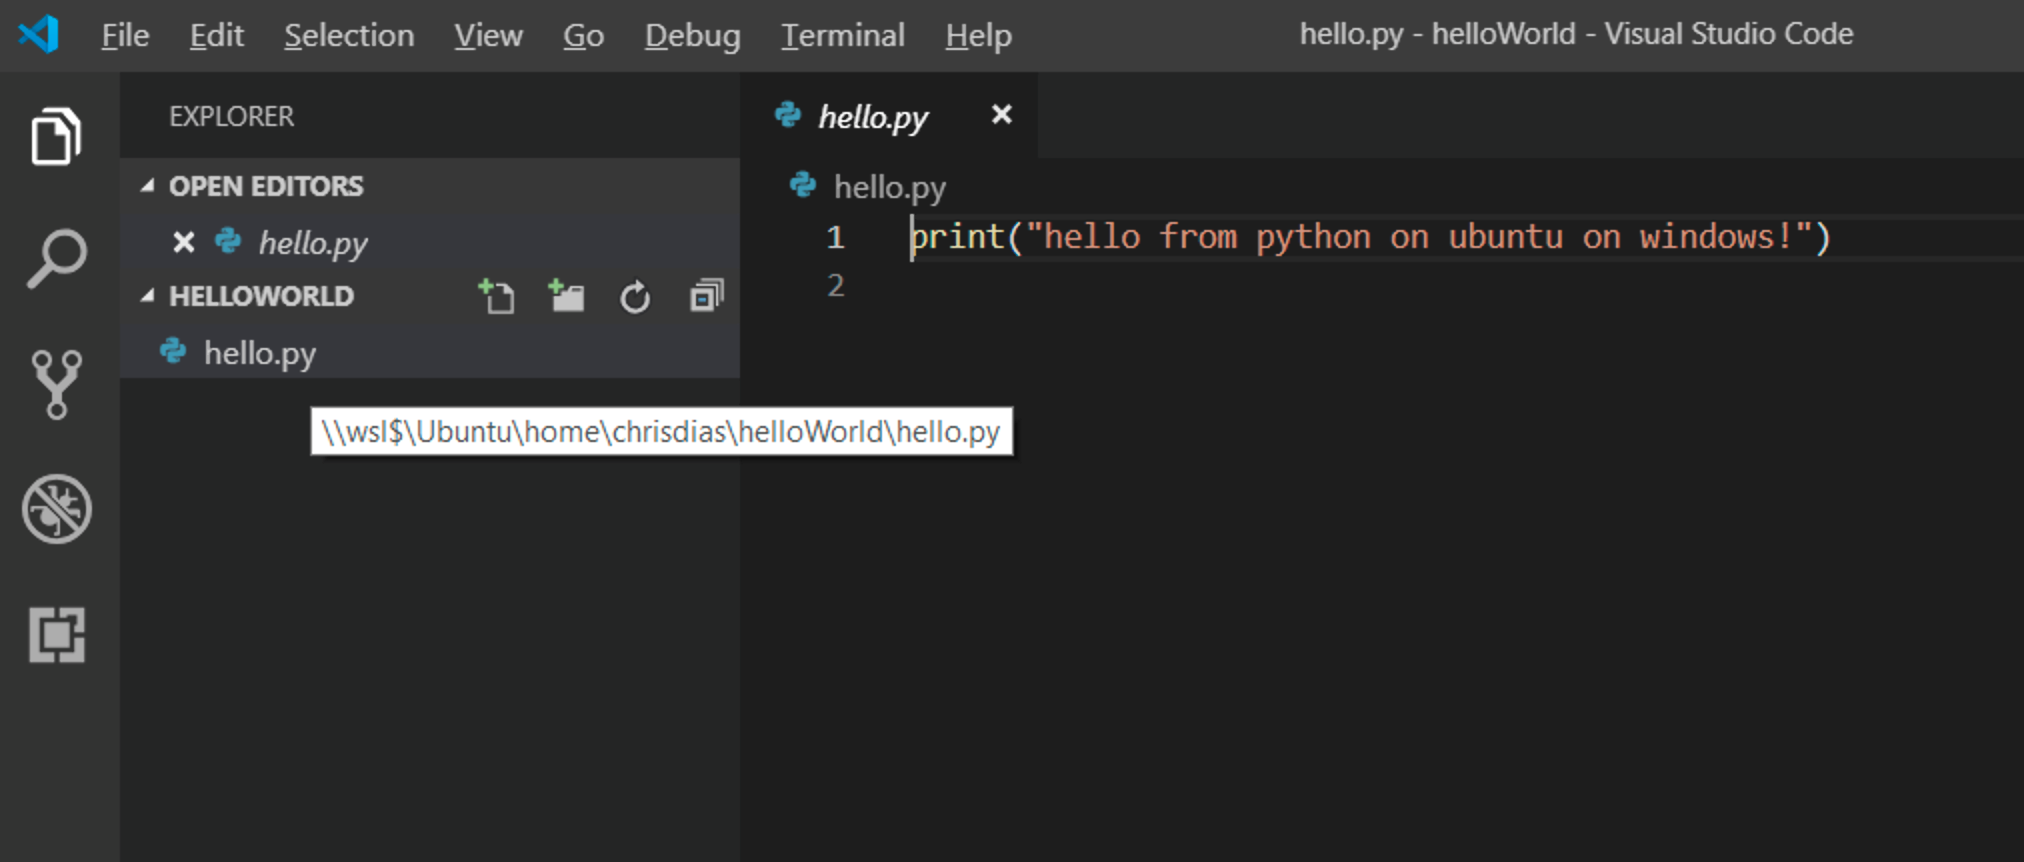
Once installed, head back over the WSL terminal, make sure you are in the helloWorld folder, and type in “code .” to launch VS Code (the “.” tells VS Code to open the current folder).
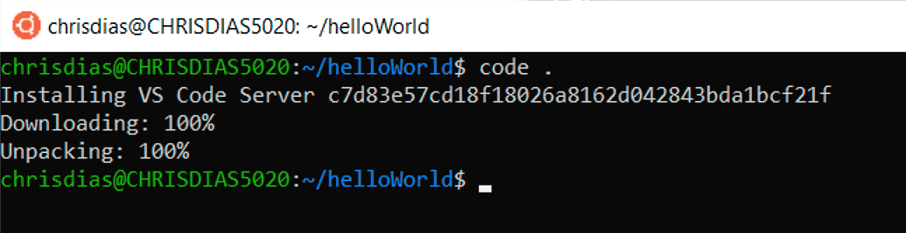
The first thing you’ll see is a message about “Installing VS Code Server” (the c7d83e57… number is the version of the VS Code Server that matches the client-side tools you just installed). VS Code is installing a small server on the Linux side that the desktop VS Code will then talk to.
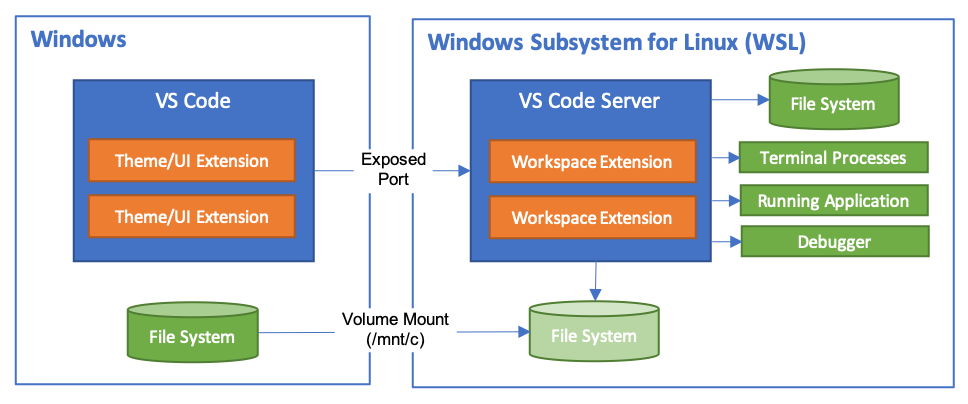
That server will then install and host extensions in WSL, so that they run in the context of the tools and frameworks installed in WSL. In other words, your Python extension will run against the Python installed in WSL, not against what is installed on the Windows side, as it should for the proper development experience.
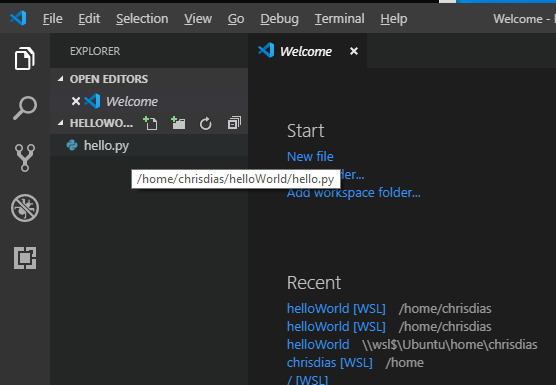
The next thing that happens is VS Code will start and open the helloWorld folder. You may see a quick notification telling you that VS Code is connecting to WSL, and you may be prompted to allow access to the Node.js-based server.
![]()
Now, when we hover over hello.py, we get the proper Linux path.
Integrated Terminal
If that doesn’t convince you we’re connected to the Linux subsystem, run Terminal > New Terminal (Ctrl+`) to open a new terminal instance.
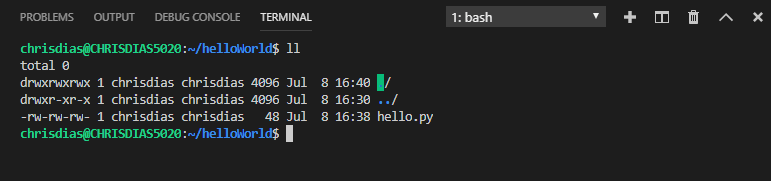
You’ll start a new instance of the bash shell in WSL, again from VS Code running on Windows.
Tip: In the lower left corner of the Status Bar, you can see that we’re connected to our WSL: Ubuntu instance.

Click on it to bring up a set of Remote – WSL extension commands.
Installing the Python extension (and additional tools)
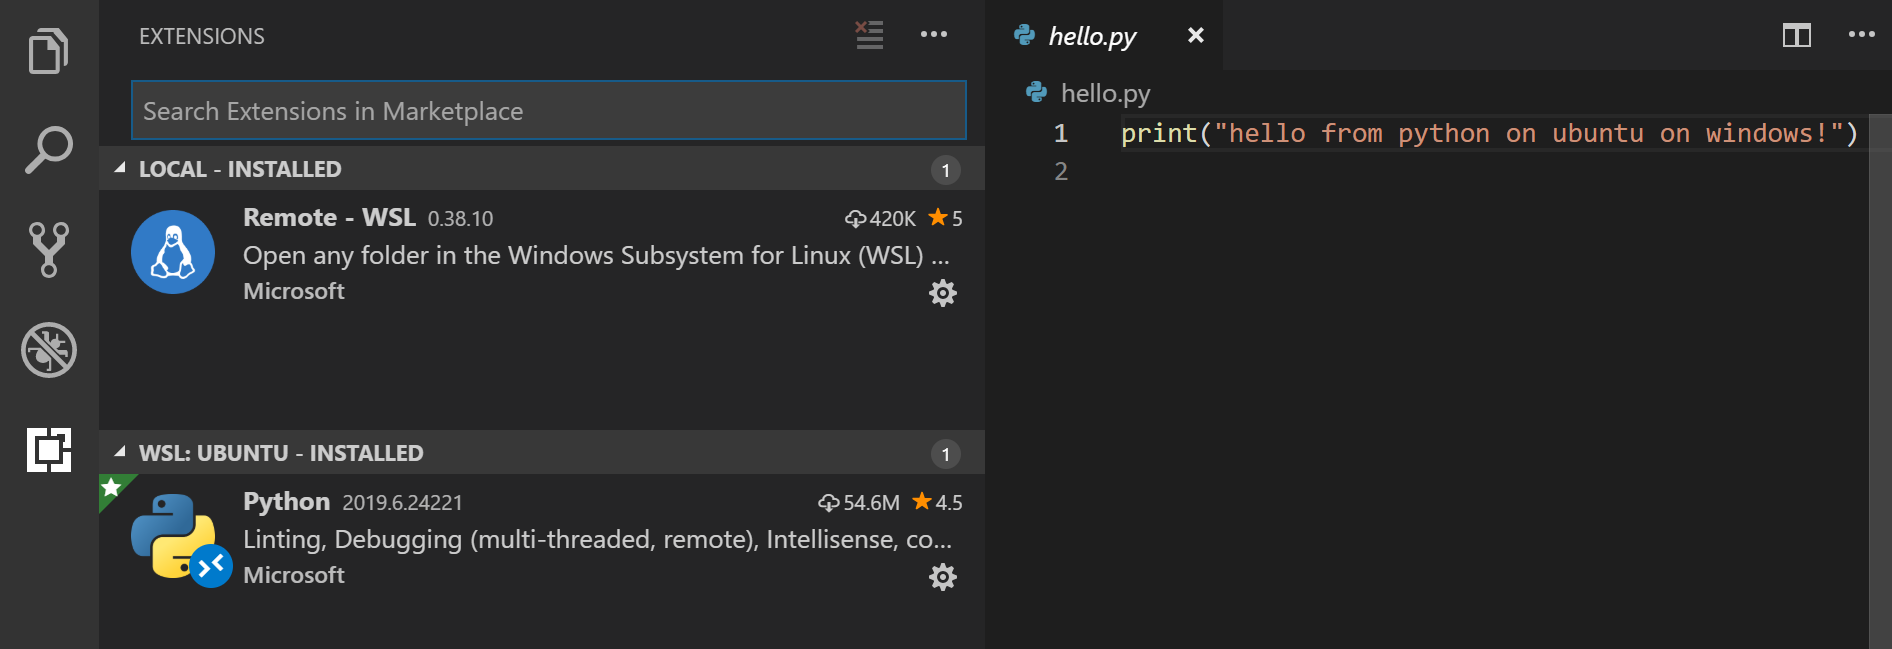
Click on hello.py to open it for editing. We are prompted with what we call an “Important” extension recommendation, in this case to install the Python extension, which will give us rich editing and debugging experiences. Go ahead and select Install and reload if prompted.

To prove that the extension is installed in WSL, open the Extensions view again (Ctrl+Shift+X). You will see a section titled WSL – Installed and you can see any extensions that are installed on the WSL side.
Upon reload, you’ll also get prompted telling you that the pylint linter is not installed. Linters are used to give us errors and warnings in our source code. Go ahead and select Install.

Now, when you edit your code, you get rich colorization and completions.
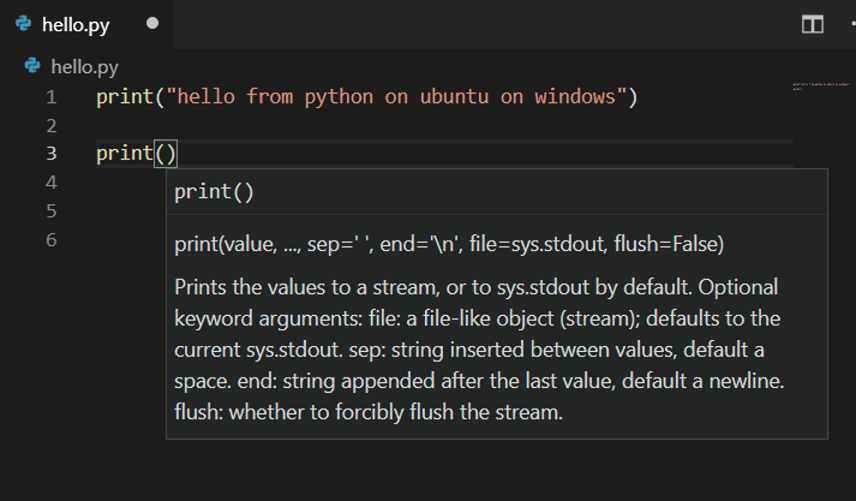
And when you save your file (Ctrl+S), you’ll get linting errors and warnings on the file.
Debugging
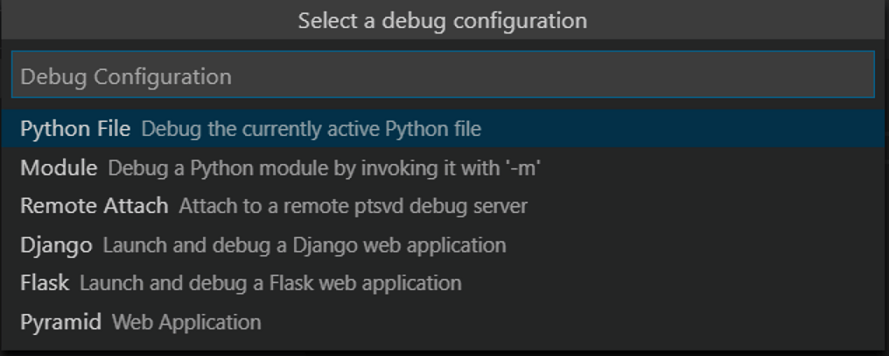
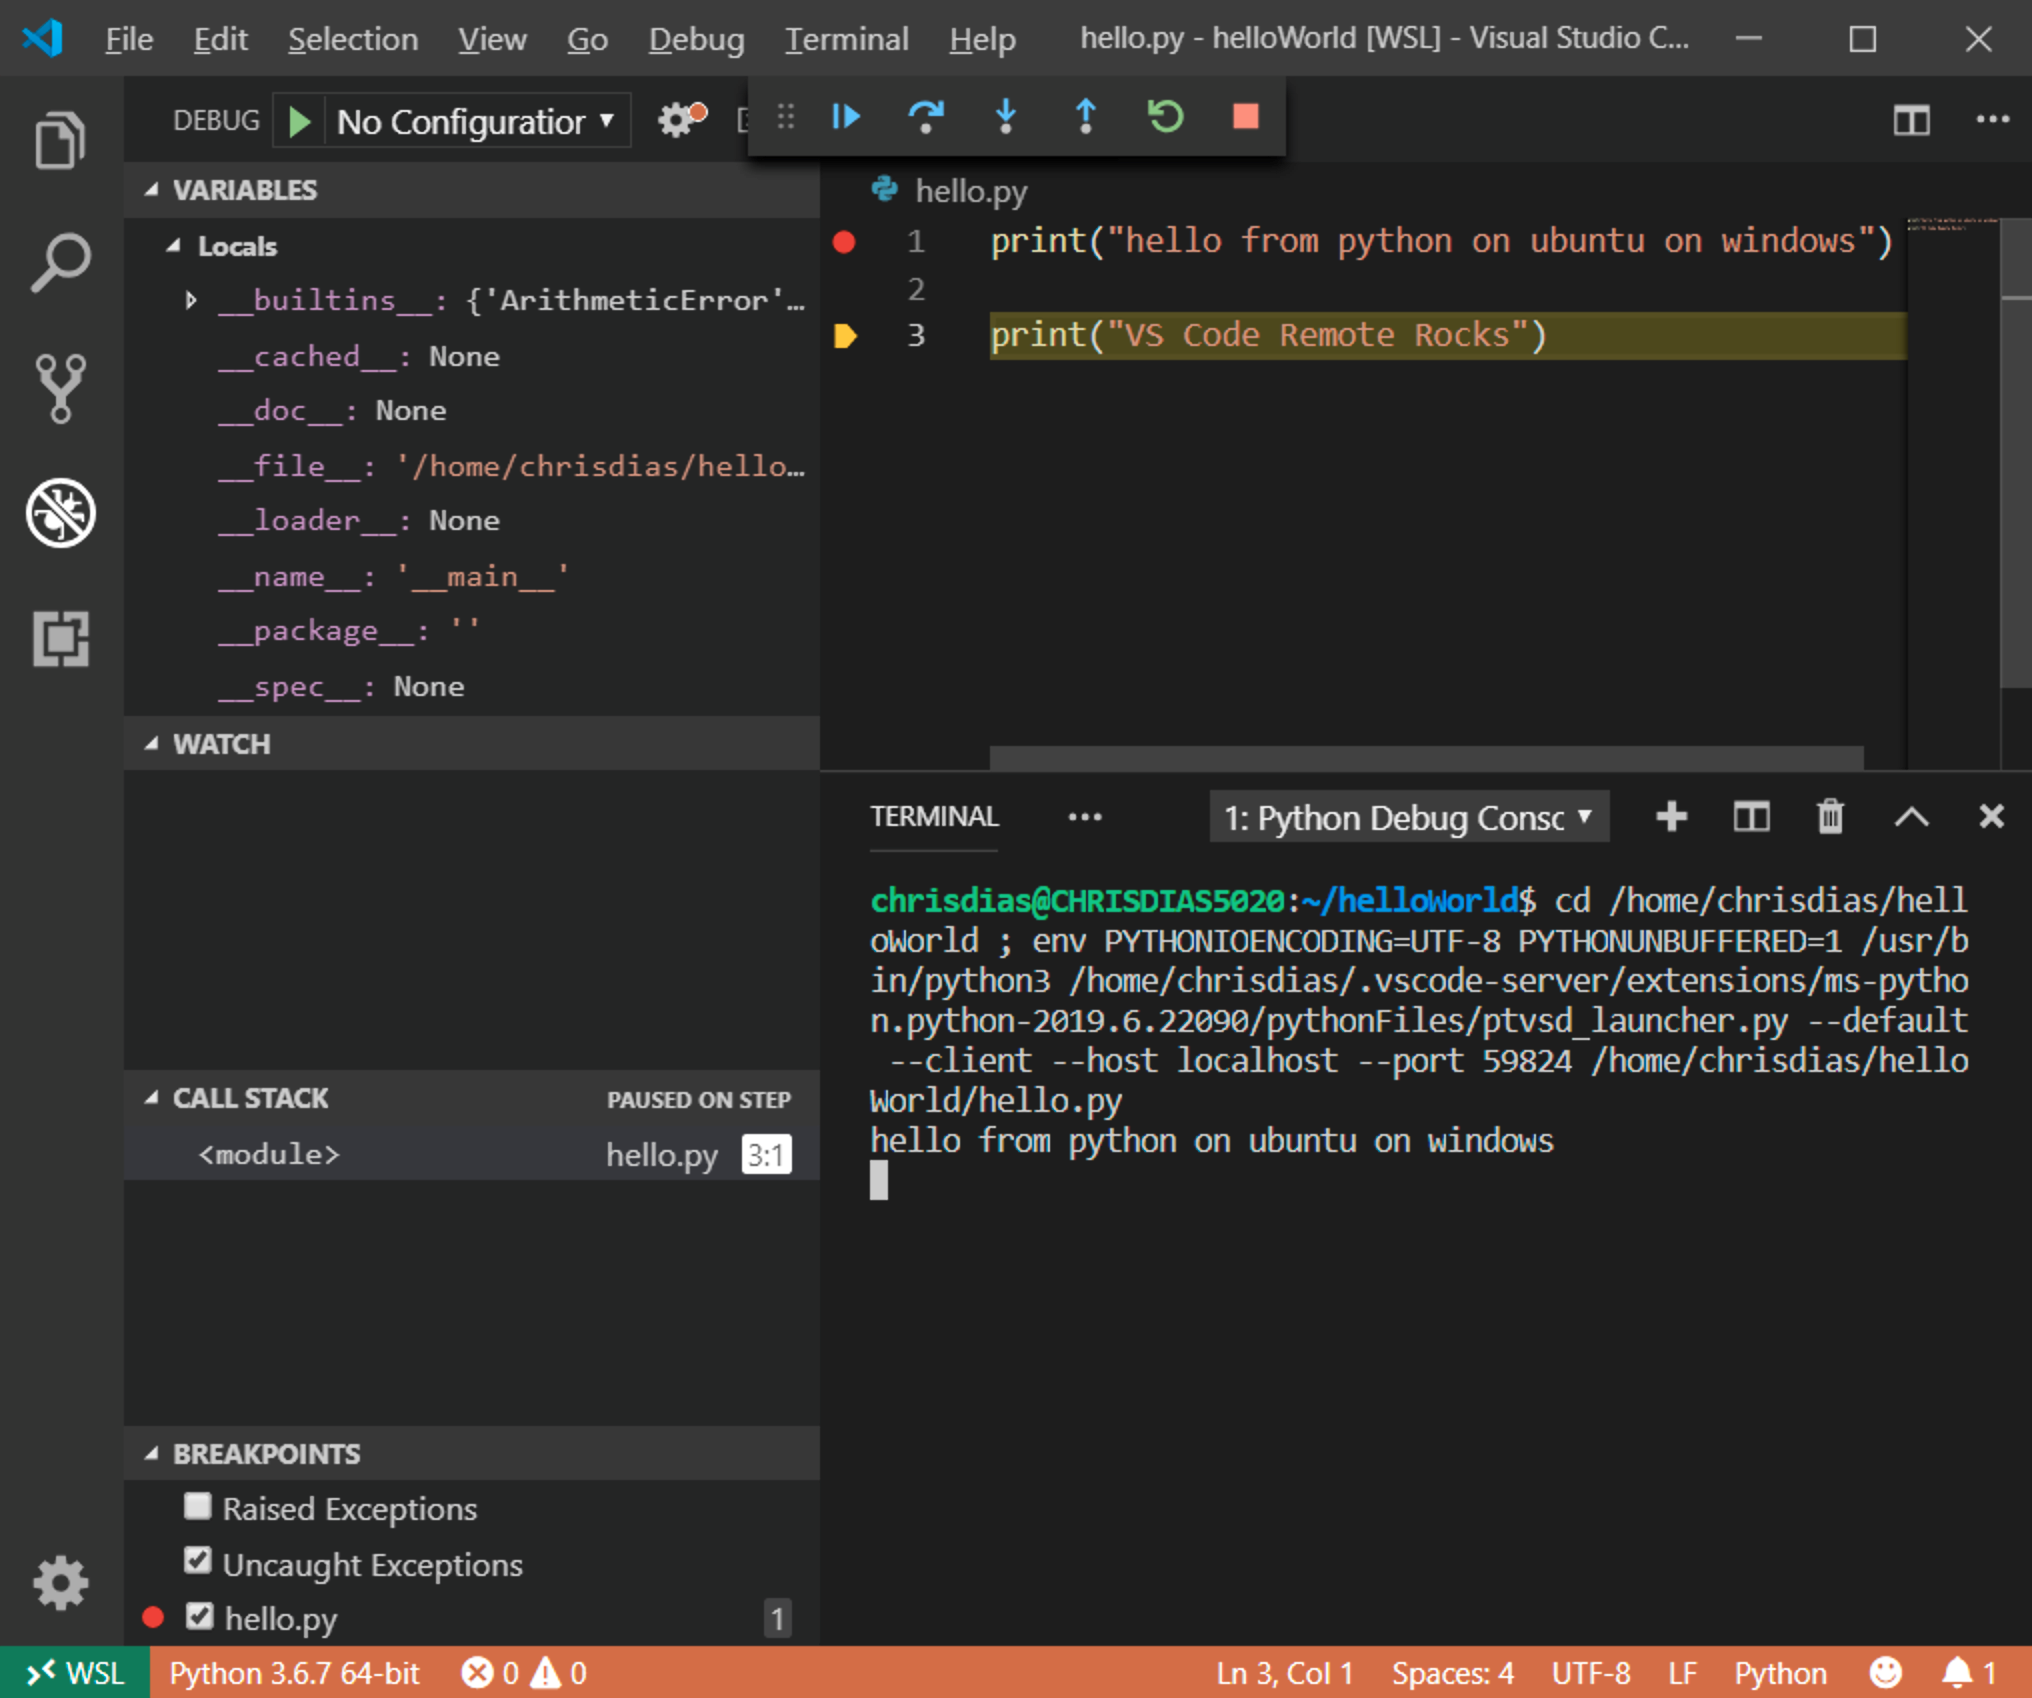
With our tools set up, let’s take this one step further. Set a breakpoint on line 1 of hello.py by clicking in the gutter to the left of the line number or by putting the cursor on the line and pressing F9.
Now, press F5 to run your application. You will be asked how to run the application, and since this is a simple file, just choose Python File.
The app will start, and you’ll hit the breakpoint. You can inspect variables, create watches, and navigate the call stack.
Press F10 to step and you’ll see the output of the print statement in the debug console.
You get the full development experience of Visual Studio Code, using the Linux instance installed in WSL.
If you want to open another folder in WSL, open the File menu and choose Open Folder. You’ll get a minimal file and folder navigator for the Linux file system, not the Windows file system.
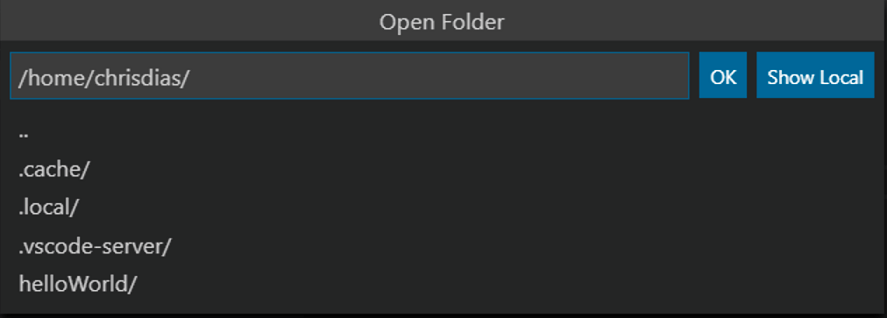
If you want to switch back to the Windows, select the Show Local option and you’ll get the standard Windows File Open dialog.
In conclusion

More information
With WSL, VS Code and the Remote – WSL extension, your Windows machine becomes an awesome box for developing Linux applications. Your tools run on Windows while your application runs where it will be deployed, on Linux.
Linux development is not limited to WSL. Using the Remote – SSH extension, you can develop against remote SSH hosts with the same fidelity as shown here, all from your Windows desktop.
For more information, check out the following resources:
- Remote development overview
- Remote WSL documentation
- Remote development with Docker Containers
- Remote development over SSH
- WSL Microsoft Learning module
- Windows Subsystem for Linux documentation
- Get started with Python in Visual Studio Code
Finally, if you really want to supercharge your Windows dev box, try out the new Windows Terminal!
Happy Coding!
This is part 2 of our 3 part series. You can find the full series here:
- Part 1 – Take your Linux development experience in Windows to the next level with WSL and Visual Studio Code Remote
- Part 2 – An In Depth Tutorial on Linux Development on Windows with WSL and Visual Studio Code
- Part 3 – Tips and Tricks for Linux development with WSL and Visual Studio Code
 Light
Light Dark
Dark
6 comments
Hi. The Python verification command should be:
python3 –version
You only have:
python3 -version
Thanks for the blog. I had an old system wide version of VS Code installed, which didn’t show the Linux path when launched from bash. It was version 1.26.
Would WSL 2 change this significantly or is it more of an under the hood overhaul?
Why will someone use Windows to develop in Linux with VSCode? (you can do the same without Windows). I don’t understand the utility of that system.
Mac@work, Windows@home is a good scenario of why someone might do this. Also, I work at Adobe where there’s a good mix of engineers on Windows and others on Mac; yet, some of them might need to work on a project that plays a bit nicer in a Linux environment. All sorts of reasons someone might do this.
This is great! However, after setting a user and password in Ubuntu, every time I launch the ubuntu terminal from Windows, the user I created is automatically logged in. How can I force Ubuntu to ask for a password?
This was exactly what i was looking for. How to activate my conda enviorment and us Visual Studio Code with linux on my windows machine! Open Ai gym works great!