View Persisted Logs in Azure Storage in Visual Studio 2012
In ScottGu’s Blog “Announcing the release of Windows Azure SDK 2.0 for .NET”, among all other new features, you learn how to stream your Windows Azure Web Site’s application logs into Visual Studio. It might be also useful if you persist those same logs in Azure Table Storage and view them in Visual Studio for certain time intervals. This blog will describe the steps how to achieve that.
You need to install Windows Azure SDK 2.0 for .NET from Windows Azure .NET Developer Center in order to use this feature.
Add Tracing To Your Application
Add some tracing in a WebForm application with Systyem.Diagnostics.Trace. To test, I usually add some traces inside the Page_Load method as shown below.
1: public partial class _Default : Page
2: {
3: protected void Page_Load(object sender, EventArgs e)
4: {
5: System.Diagnostics.Trace.TraceError("Application Error.");
6: System.Diagnostics.Trace.TraceWarning("Application Warning.");
7: System.Diagnostics.Trace.TraceInformation("Application Information.");
8: System.Diagnostics.Trace.WriteLine("Application WriteLine.");
9: }
10: }
Publish the project to Azure from VS 2012.
Store Application Logs in an Azure Table Storage
– At the Azure Portal, create a storage to store our application logs.
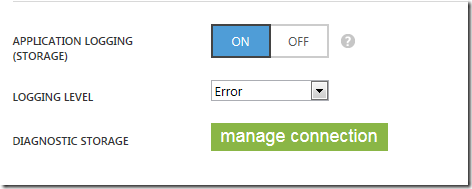
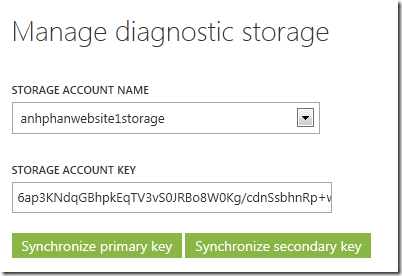
– You need to associate your web site with this storage by clicking on the “manage connection” under the Configure tab of your Azure site.
– Select the storage you created above in the pop-up dialog.
– This setting will show up under the Connection strings section of the site after the steps above.
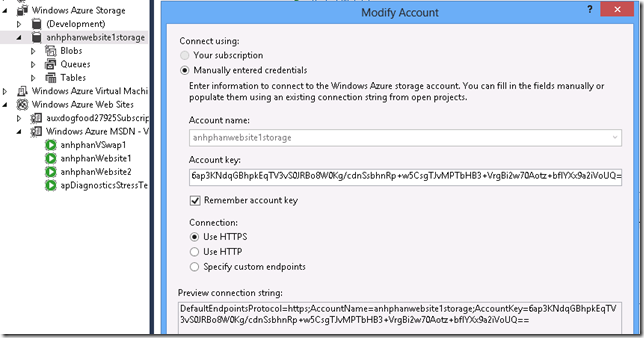
Alternatively, you can set this connection string “CLOUD_STORAGE_ACCOUNT” manually within VS if you know the storage account key
– You can obtain the storage account’s key from the “Modify Account” dialog of the storage listed under “Windows Azure Storage” node in Server Explorer in Visual Studio.
Now you’re ready to see how things will work together.
First, we need to generate some application logs so we can view them later. Using the Azure Web Site with System.Diagnostics traces that we added at the beginning of this blog, each time we view//refresh the Default page in a browser, log will be generated and persisted in the Azure Table storage associated with the site.
View the Most Recent Application Logs in Azure Table
– Switch to the Logs tab of the site’s Settings window.
– The first time you open this Logs tab, you will see the spinning wheel indicating that it’s trying to retrieve the application logs in the Azure storage of the site. When the retrieval is complete, you will see the logs displayed in the table .
– You can change the time interval when the logs being stored in the Azure storage by change the dropdown selection
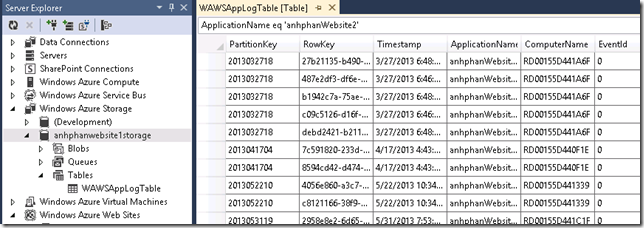
Also, if you want to view all the logs in the storage, click on the link on the upper right “View all application logs”, shown in the above picture. This will take you to the WAWSAppLogTable tab which lists all the loggings.
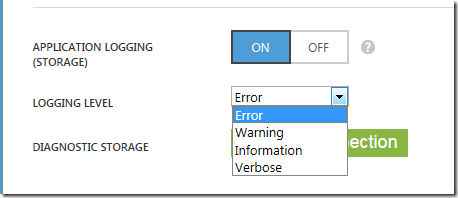
Note that by default, it will log only Application Errors traces of your site. To change the logging level, you need to go to the Configure tab of your site’s Portal UI






 Light
Light Dark
Dark
0 comments